AWS QuickStart Step 3
Need help setting this up? - For a guided tutorial, see the video walkthrough at the bottom of this page.
Note
This guide assumes that Spinnaker is installed with Halyard, not Operator.Prerequisite
Before you start, ensure that have completed the following requirements:
- Finish AWS QuickStart Step 2
Deploy to EC2 and EKS
Before you start, you need to log in to Deck, the Spinnaker UI.
You can access it by navigating to the Public IP address of your instance in a browser. You can get the Public IP address from your AWS Console.
If you have forgotten the password to your Minnaker instance you can recover your password with the following steps:
- SSH to the Minnaker host VM. Do not exec into the Halyard pod though.
- Run the following command:
cat /etc/spinnaker/.hal/.secret/spinnaker_password
The command returns the password for Minnaker.
After you log in to Deck, perform the following steps:
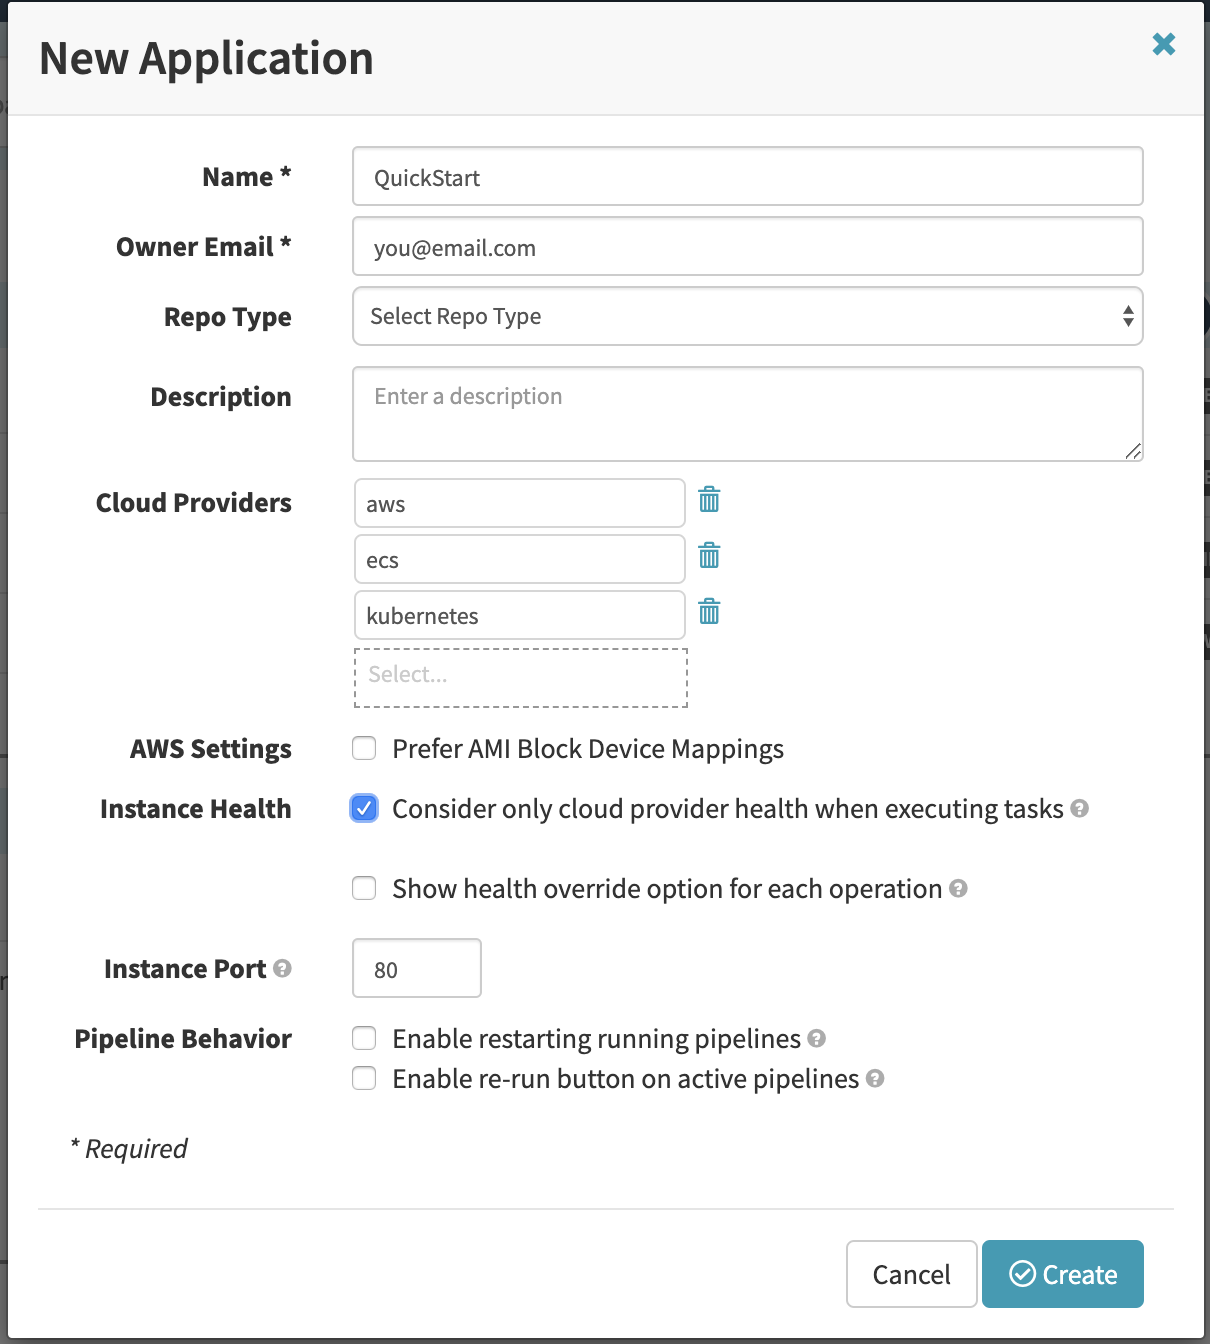
- Create an Application called QuickStart by clicking “Applications” tab > “Action” (top right) > “Create New App” with the following Settings
Go into Application QuickStart and create your first pipeline. This pipeline will deploy to an EC2 instance.
Click Add Stage + and search for a Bake stage to bake an AMI.
Select the AWS Region you want to deploy to.
Click Add Server Group and configure basic AMI bake settings: Account, Region, Subnet, Instance Type, and AWS SSH key. Note: For more information about setting up your Bake Stage, please check out configuring AWS networks, which includes guides about requirements regarding subnet configuration.
Click Done and then Save Changes in the bottom right corner.
Click Add Stage and add another stage called Deploy for AWS EC2.
Click the “Back to Execution” button on the top left of the Pipeline Name
Run your Pipeline and Validate! The end result will be an Auto Scaling Group build within your AWS subnet.
EC2 Pipeline and deployment
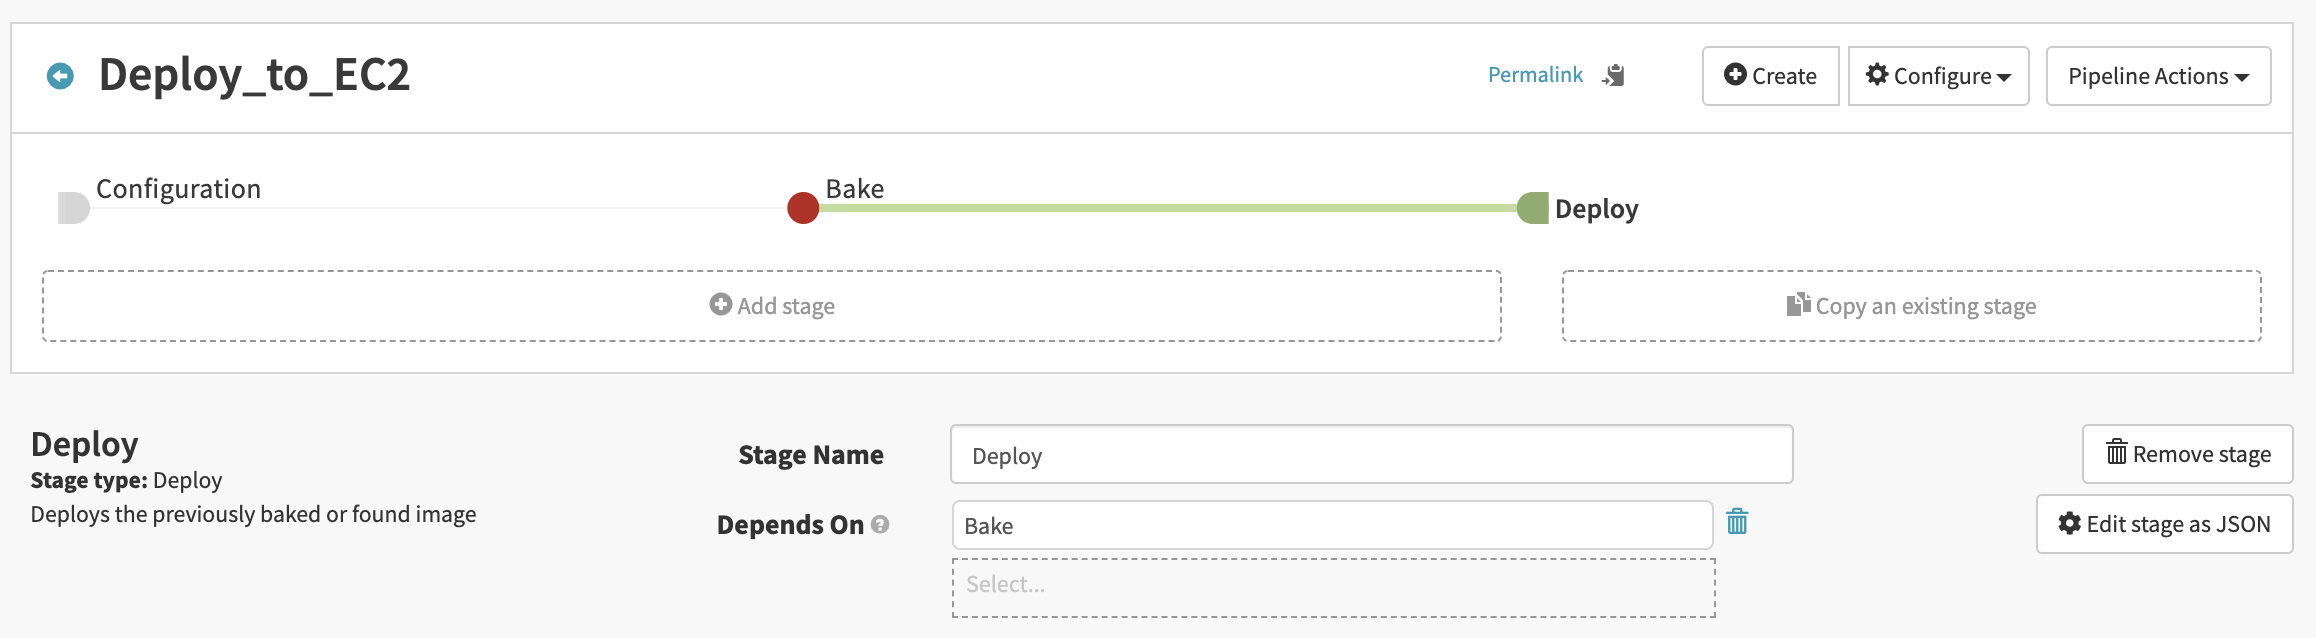
Note - Don’t mind the red dot in the Bake Stage. It’s an informational tip suggesting a CI Trigger should be configured for a Bake Stage to ensure you are deploying the latest code and artifacts.

EKS deployment
Note As a prerequisite, create a “quickstart” namespace in EKS:
kubectl create ns quickstart
- Navigate to the pipeline page within your QuickStart application.
- Click Create button in top right corner.
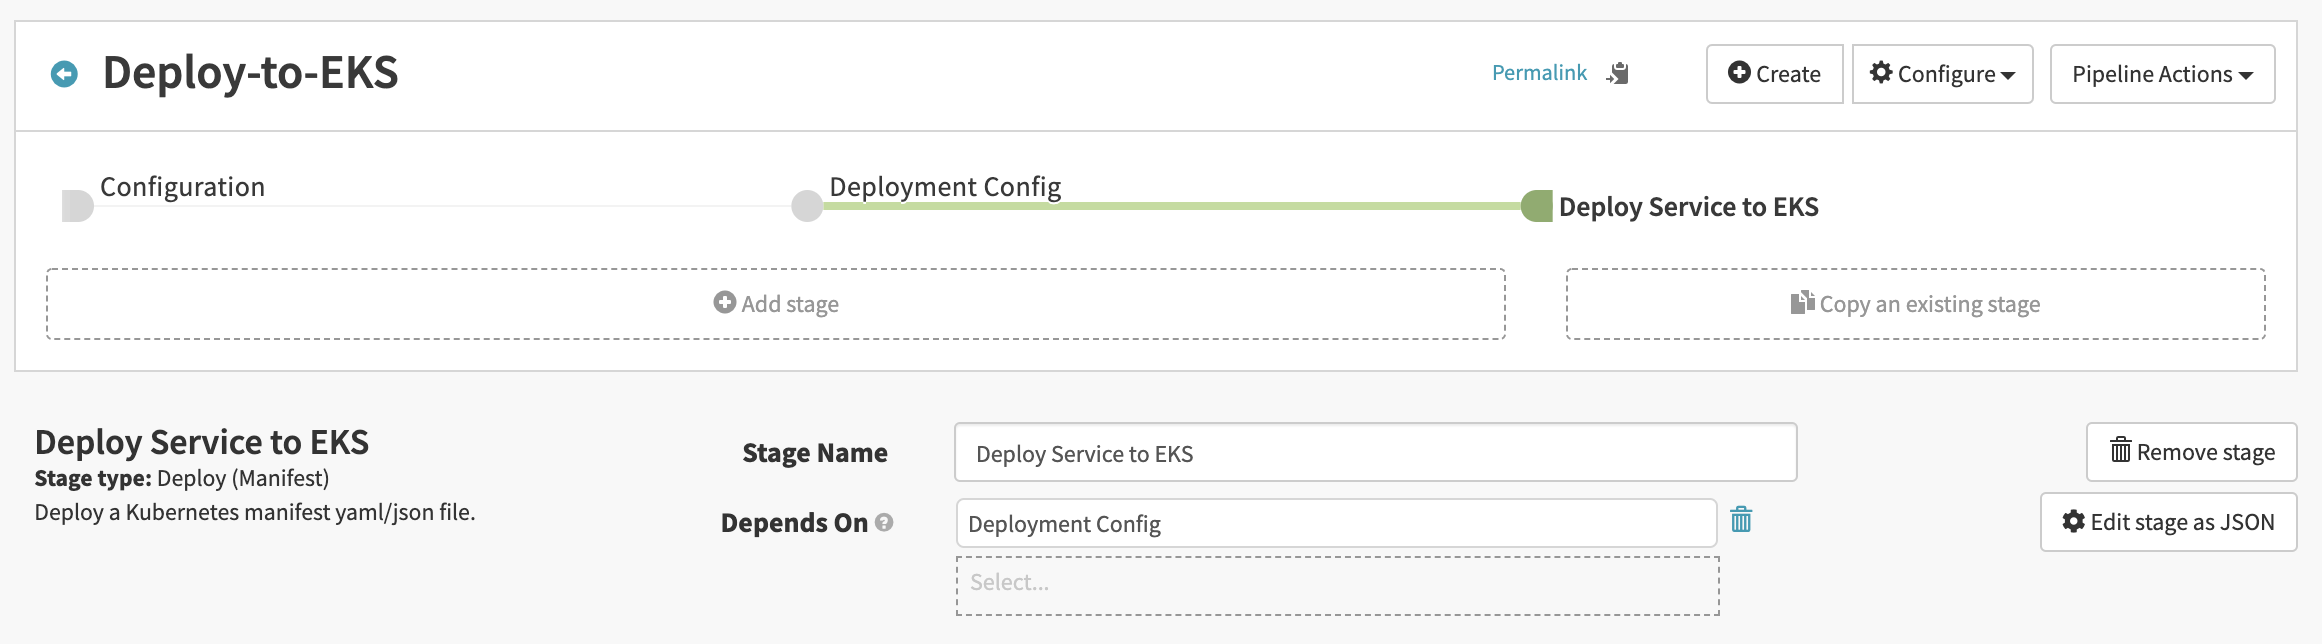
- Give the name Deploy-to-EKS.
- Click Add Stage and Search / Select Deploy(Manifest).
- Select the kubeconfig-sa-eks account created in Step 2.
- Select the quickstart namespace.
- Scroll down and paste in the Deployment yaml below.
- Click Save Changes in the bottom right corner.
- Now create another stange after the Deployment stage. Again select Deploy(Manifest).
- Select the kubeconfig-sa-eks account and the quickstart namespace for deployment.
- Scroll down and paste in the Service yaml below.
- Click Save Changes.
Time to run your EKS pipeline and validate
- Click back to the pipeline page using the Back to Executions to the left of the pipeline name.
- Click on the Start Manual Execution on the new pipeline. Then, click Execution Details to see pipeline in action.
Deployment yaml definition
Copy and paste the following example into the text field in the 1st Deploy Manifest stage.
apiVersion: apps/v1
kind: Deployment
metadata:
  name: my-nginx
spec:
  replicas: 2
  selector:
    matchLabels:
      run: my-nginx
  template:
    metadata:
      labels:
        run: my-nginx
    spec:
      containers:
        - image: nginx
          name: my-nginx
          ports:
            - containerPort: 80
Service yaml for last Deployment Stage
Copy and paste the following example into the text field in the 2nd Deploy Manifest stage.
apiVersion: v1
kind: Service
metadata:
  labels:
    run: my-nginx
  name: my-nginx
spec:
  ports:
    - port: 80
      protocol: TCP
      targetPort: 80
  selector:
    run: my-nginx
  type: LoadBalancer
Validation in EKS and in Spinnaker
- In EKS run the following commands to see nginx pods being created:
kubectl get pods -n quickstart. - In Deck, the Spinnaker UI, navigate to the Applications page and see the deployment and containers there.
- Under Load Balancers, click on Apps to view the status of your service.
- In the Status section on the right of the page, locate the Ingress address that was created to allow public access to your new deployment.
- Copy and paste the FQDN from the load balancer status section into a web browser to test the NGINX landing page.


Congratulations
You completed the QuickStart exercise! You can now deploy to AWS using Spinnaker. What’s Next?
- Connect your Spinnaker instance to your repositories / artifacts (Github, Sonatype, Artifactory, DockerHub, ECR, GCR, etc).
- Build in a automated trigger from your CI systems (Jenkins, Bamboo, CircleCI, TravisCI, Nexus, Git, Generic Webhook, etc).
- Integrate with 3rd party systems (OKTA, Sumo Logic, Splunk, Datadog, Newrelic, Slack, etc).
- Integrate with DevSecOps tools (Xray, ChaosMonkey, Artifactory, etc).
To get expert help in any of the areas above you can contact Armory.io at https://go.armory.io/needs-analysis
Feedback
Was this page helpful?
Thank you for letting us know!
Sorry to hear that. Please tell us how we can improve.
Last modified October 17, 2023: (aa87b671)