Use Kustomize for Manifest-Based Kubernetes Deployments in Spinnaker
Overview of Kustomize
Kustomize is a tool that lets you create customized Kubernetes deployments without modifying underlying YAML configuration files. Since the files remain unchanged, others are able to reuse the same files to build their own customizations. Your customizations are stored in a file called kustomization.yaml. If you need to make configuration changes, the underlying YAML files and kustomization.yaml can be updated independently of each other.
To learn more about Kustomize and how to define a kustomization.yaml file, see the following links:
In the context of Spinnaker, Kustomize lets you generate a custom manifest, which can be deployed in a downstream Deploy (Manifest) stage. This manifest is tailored to your requirements and built on existing configurations.
Spinnaker uses the latest non-kubectl version of Kustomize.
Using Kustomize
Kustomize works by running kustomize build against a kustomization.yaml file located in a Git repository. This file defines all of the other files needed by Kustomize to render a fully hydrated manifest.
Kustomize
Requirements
Kustomize requires the git/repo artifact type.
Configure git/repo artifact with Operator
Add the following settings to the SpinnakerService manifest:
apiVersion: spinnaker.armory.io/v1alpha2
kind: SpinnakerService
metadata:
  name: spinnaker
spec:
  spinnakerConfig:
    config:
      artifacts:
        gitrepo:
          enabled: true
          accounts:
          - name: gitrepo
            username: # Git username.
            token: encrypted:k8s!n:spin-secrets!k:github-token # Your github access token from a K8s secret (here secret='spin-secrets', key='github-token')
Build the Pipeline
For this example, you can use the helloWorld example from the Kustomize public repository.
Step 1 - Add an Expected Artifact
Add a git/repo Expected Artifact in the Configuration section:
- Account (Required): The
git/repoaccount to use. - URL (Required): The location of the Git repository.
- Branch (Optional): The branch of the repository you want to use. Defaults to
master. - Subpath (Optional): By clicking
Checkout subpath, you can optionally pass in a relative subpath within the repository. This provides the option to checkout only a portion of the repository, thereby reducing the size of the generated artifact. 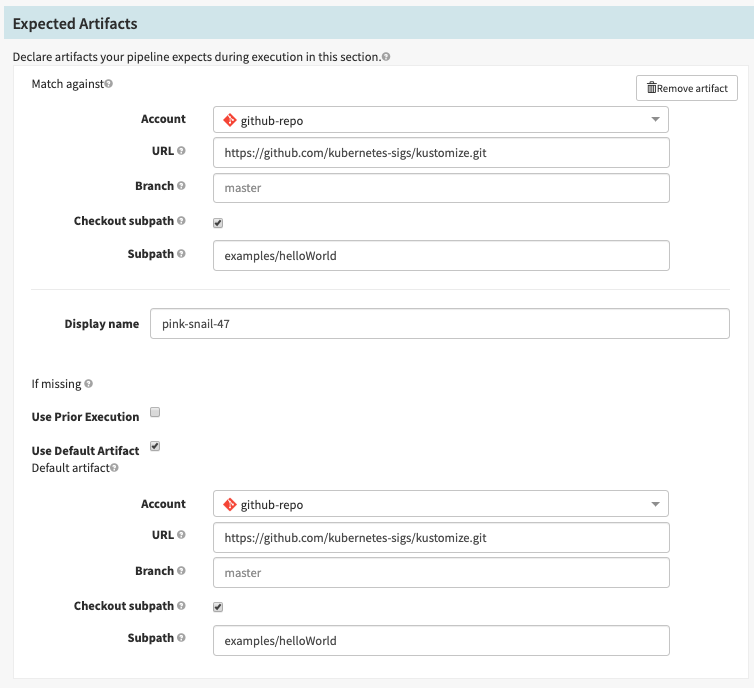
In order to execute the pipeline manually, it is necessary to select Use Default Artifact and also fill the fields (same information above).
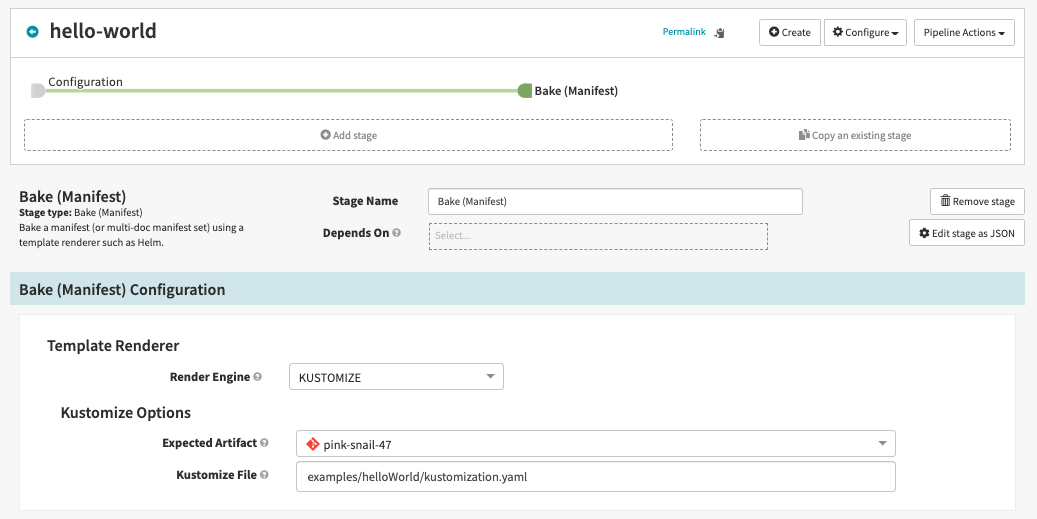
Step 2 - Add a Bake (Manifest) Stage
Add a Bake (Manifest) stage and choose the Render Engine KUSTOMIZE. Then, select the Expected Artifact you created in step 1 and specify the path for the kustomization.yaml file.
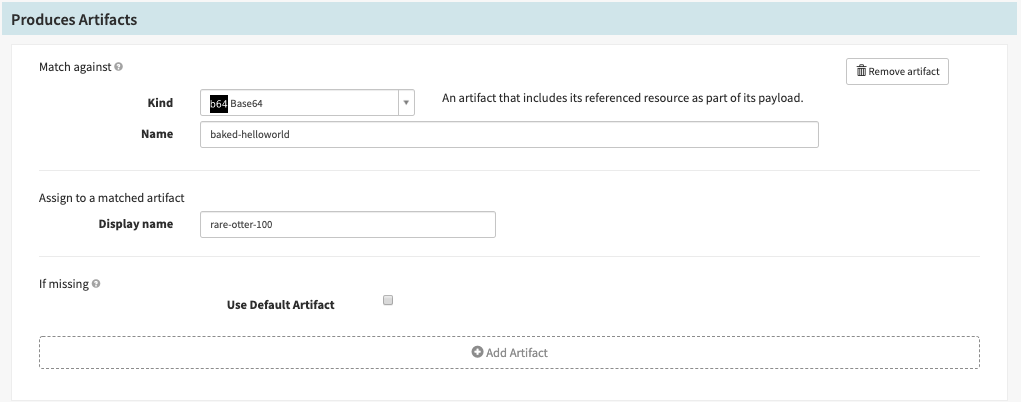
Step 3 - Produce the Artifact
Spinnaker returns the manifest in a Base64 encoded file, so it is necessary to Produce a single Base64 Artifact in this Bake (Manifest) stage:
Step 4 - Deploy
Add a Deploy (Manifest) stage. Make sure to select the Manifest Source: Artifact and select the Base64 Artifact produced by the Bake (Manifest) stage.
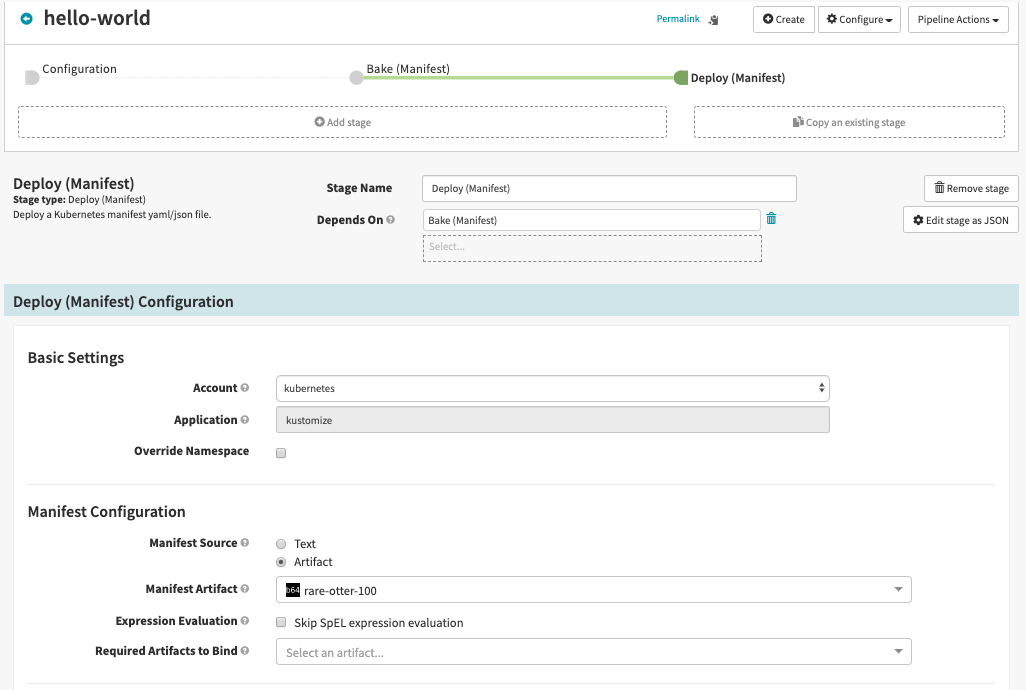
Note: As we are deploying a manifest without a specified namespace, we need to override the namespace by checking the “Override Namespace” option in the deployment stage.
Run the Pipeline
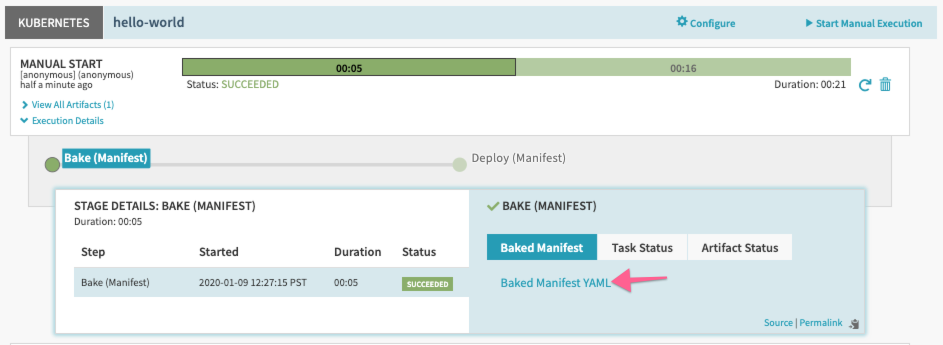
After you execute the pipeline, you can see the manifest generated in YAML format by clicking on the Baked Manifest YAML link:
Feedback
Was this page helpful?
Thank you for letting us know!
Sorry to hear that. Please tell us how we can improve.
Last modified October 17, 2023: (aa87b671)