Use the Evaluate Artifacts Stage

Before you begin
The Evaluate Artifacts Stage is a plugin for Armory Continuous Deployment. You must have the plugin enabled. For more information, see Enable the Evaluate Artifacts Stage Plugin.
Using the stage
At a high level, using this stage involves the following steps:
- In the Armory Continuous Deployment UI, navigate to the pipeline you want to modify.
- Add any parameters you might use within the pipeline.
- Add the stage called Evaluate Artifacts stage to your pipeline.
- Under the Evaluate Artifacts Configuration, select Add Artifact to the stage. A window appears where you can enter your artifact definition.
- Enter your artifact definition:
- Provide a descriptive name for the artifact.
- Enter the artifact definition in the Contents section. When entering the definition, you can use a SpEL expression to parameterize it to use the input from step 2.
- Save your changes.
When the pipeline runs, the UI prompts the user to enter a value for the parameter, and you can now reference this artifact in subsequent stages or other pipelines.
Example
This example combines Armory’s Terraform Integration and the Evaluate Artifact stage to insert values a user inputs into artifacts when the pipeline runs. The example uses the Evaluate Artifact stage to insert the app name, namespace and number of replicas into the sample Terraform script. Then, the Terraform Integration deploys the infrastructure (NGINX in this example).
To follow along with this example, you need to have the Terraform Integration stage enabled and have permission to provision a Kubernetes cluster and any associated resources.
In the Armory UI, create a new pipeline.
For the Configuration phase of the pipeline, add the following parameter:
nameAndSpacereplicasand set the Default Value to2.
For both parameters, set them to required. Optionally, pin the parameters.
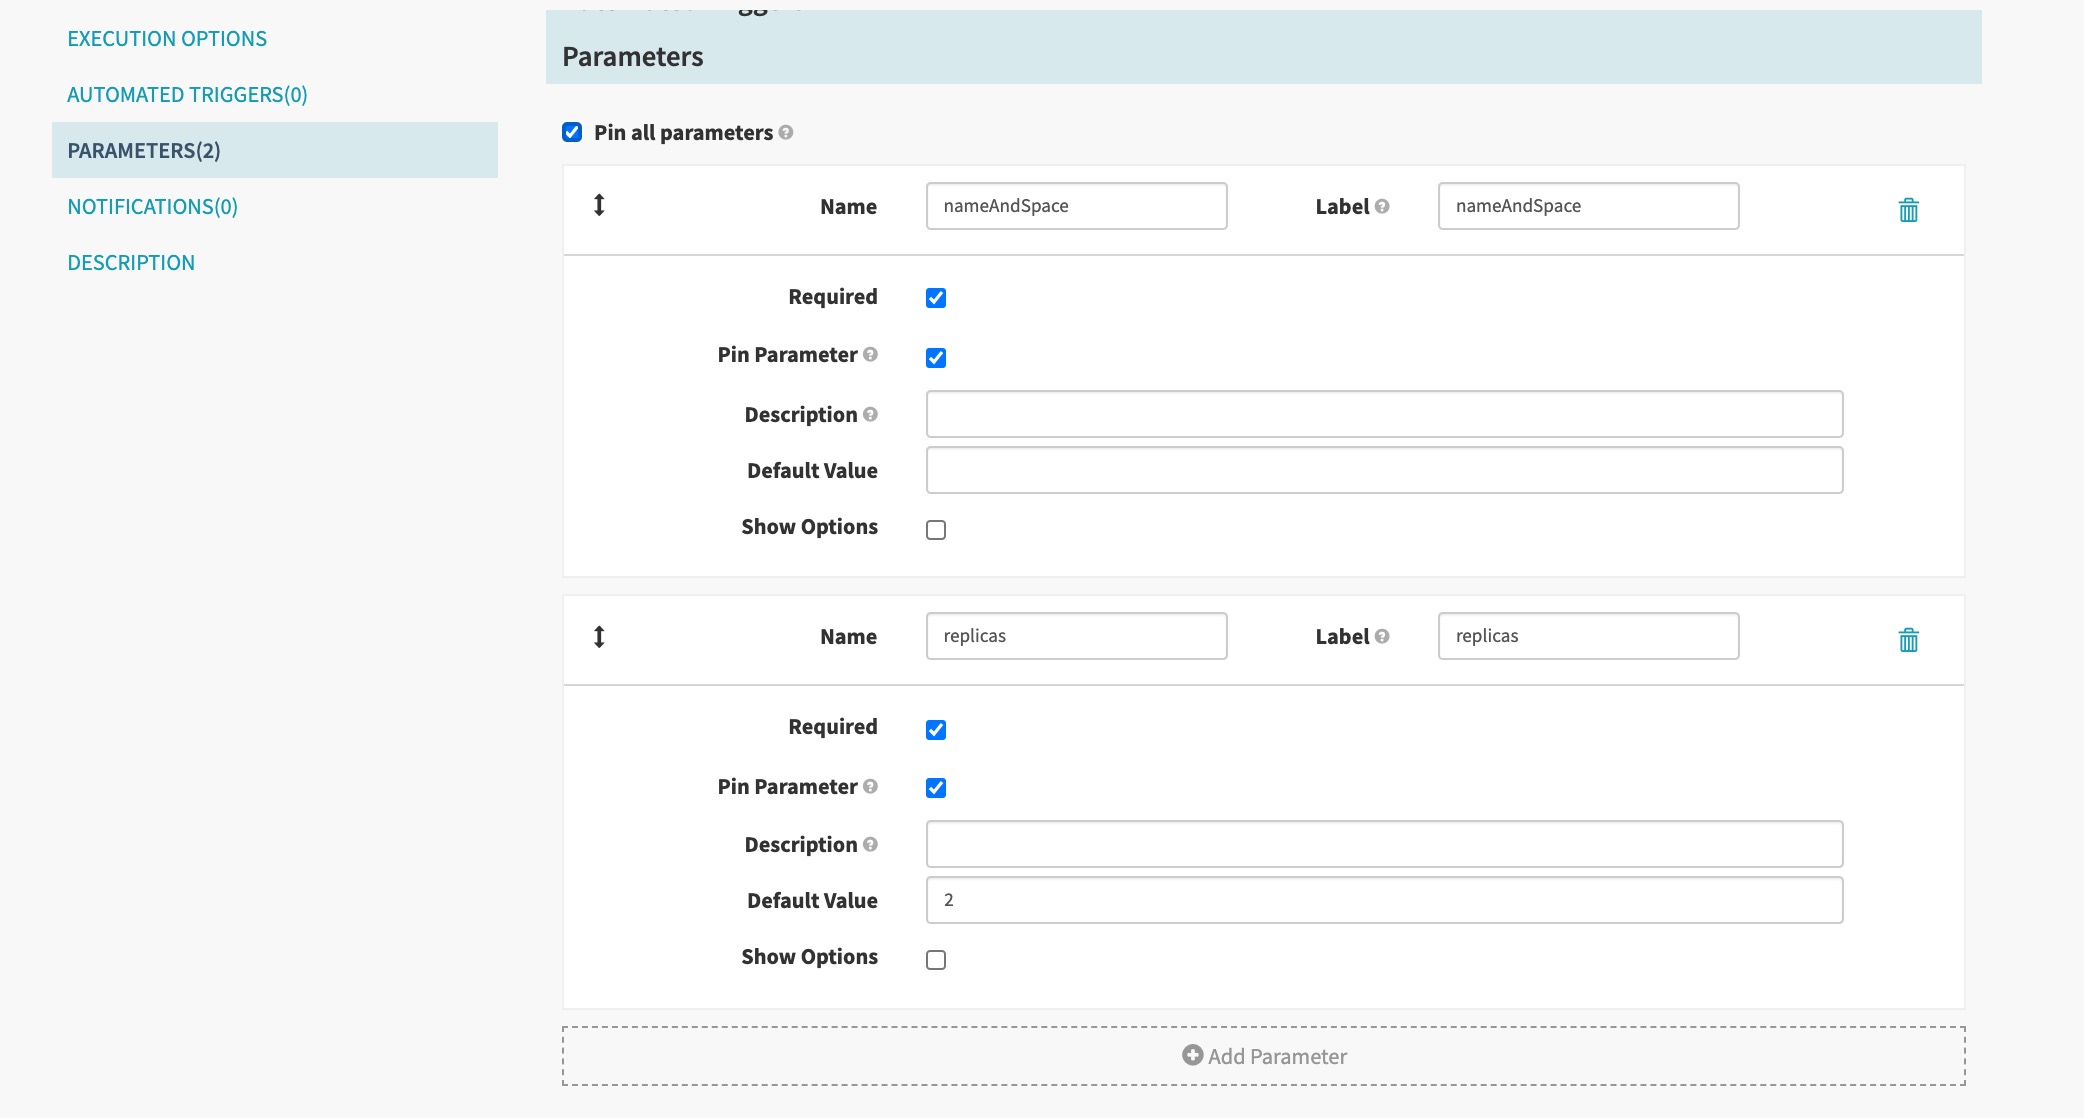
Save your changes.
Add a stage to the pipeline and set the type to Evaluate Artifacts.
Provide a name for the stage.
Under Evaluate Artifacts Configuration, add an artifact:
This example creates a tfvar file, so name it
testvariables.tfvar.For the Contents section, insert the following snippet:
namespace="${#readJson(parameters['nameAndSpace'])['space']}" # SpEL expression
deployName="${#readJson(parameters['nameAndSpace'])['name']}" # SpEL expression
replicas=${parameters.replicas}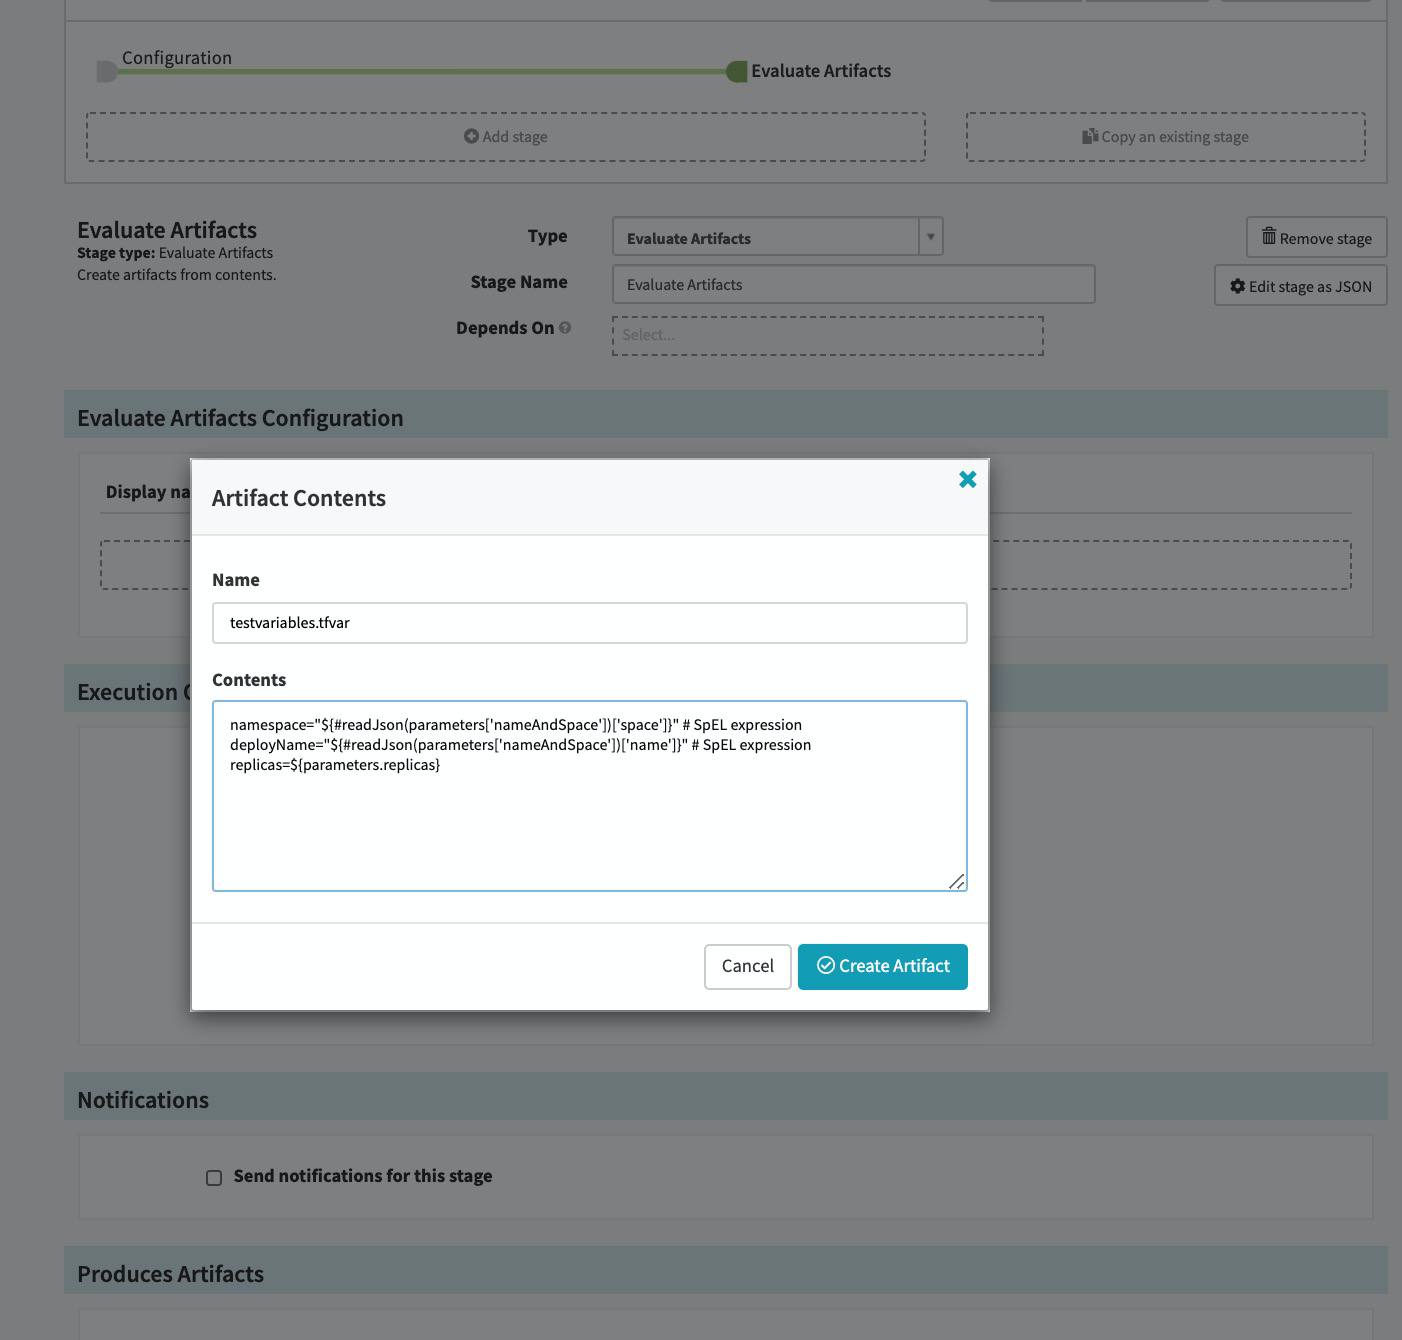
All three fields were added previously as parameters for the pipeline. The
namespaceanddeployNamefields are SpEL expressions that evaluate JSON that you provide when the pipeline runs.replicasaccepts an integer value for the number of replicas you want. You can provide a value when the pipeline runs or use the default value of 2.
Create the artifact.
Wait until the Save Changes button becomes available. Then, save your artifact.
Add a second artifact for Evaluate Artifacts Configuration. Use the following example:
Name the artifact
main.tfand use the following snippet for the Contents:
Show the Terraform script that deploys an NGINX container in a Kubernetes cluster
variable "namespace" {
  type = string
}
variable "deployName" {
  type = string
}
variable "replicas" {
  type = number
}
resource "kubernetes_namespace" "test" {
  metadata {
    name = var.namespace
  }
}
resource "kubernetes_deployment" "test" {
  metadata {
    name = var.deployName
    namespace = kubernetes_namespace.test.metadata.0.name
  }
  spec {
    replicas = var.replicas
    selector {
      match_labels = {
        app = "MyTestApp"
      }
    }
    template {
      metadata {
        labels = {
          app = "MyTestApp"
        }
      }
      spec {
        container {
          image = "nginx"
          name = "nginx-container"
          port {
            container_port = 80
          }
        }
      }
    }
  }
}
Note that the variable block at the beginning of the script declares the variables namespace, deployName, and replicas for the script, which are configured as parameters for the pipeline.
This example adds the Terraform script directly to the pipeline. You can also store it in source control, such as GitHub, and reference it that way.
- Add a Terraform stage to the pipeline with the following characteristics:
- Set the Action to Plan.
- Select Save Plan Output
- For Main Terraform Artifact > Expected Artifact, select
main.tf. This is the Terraform script. - For Terraform Artifacts > Expected Artifact, select
testvariables.tfVar. This is the variables file for Terraform. - For Produces Artifacts, add an artifact named
planfileof typeembedded artifact.
The plan file is the result of the stage and can be consumed by Terraform stages that perform the apply action.
- Optionally, add a Manual Judgment stage. Although not required, it is good practice to add a Manual Judgment after a plan stage so that you can confirm the stage does what you expect it to do.
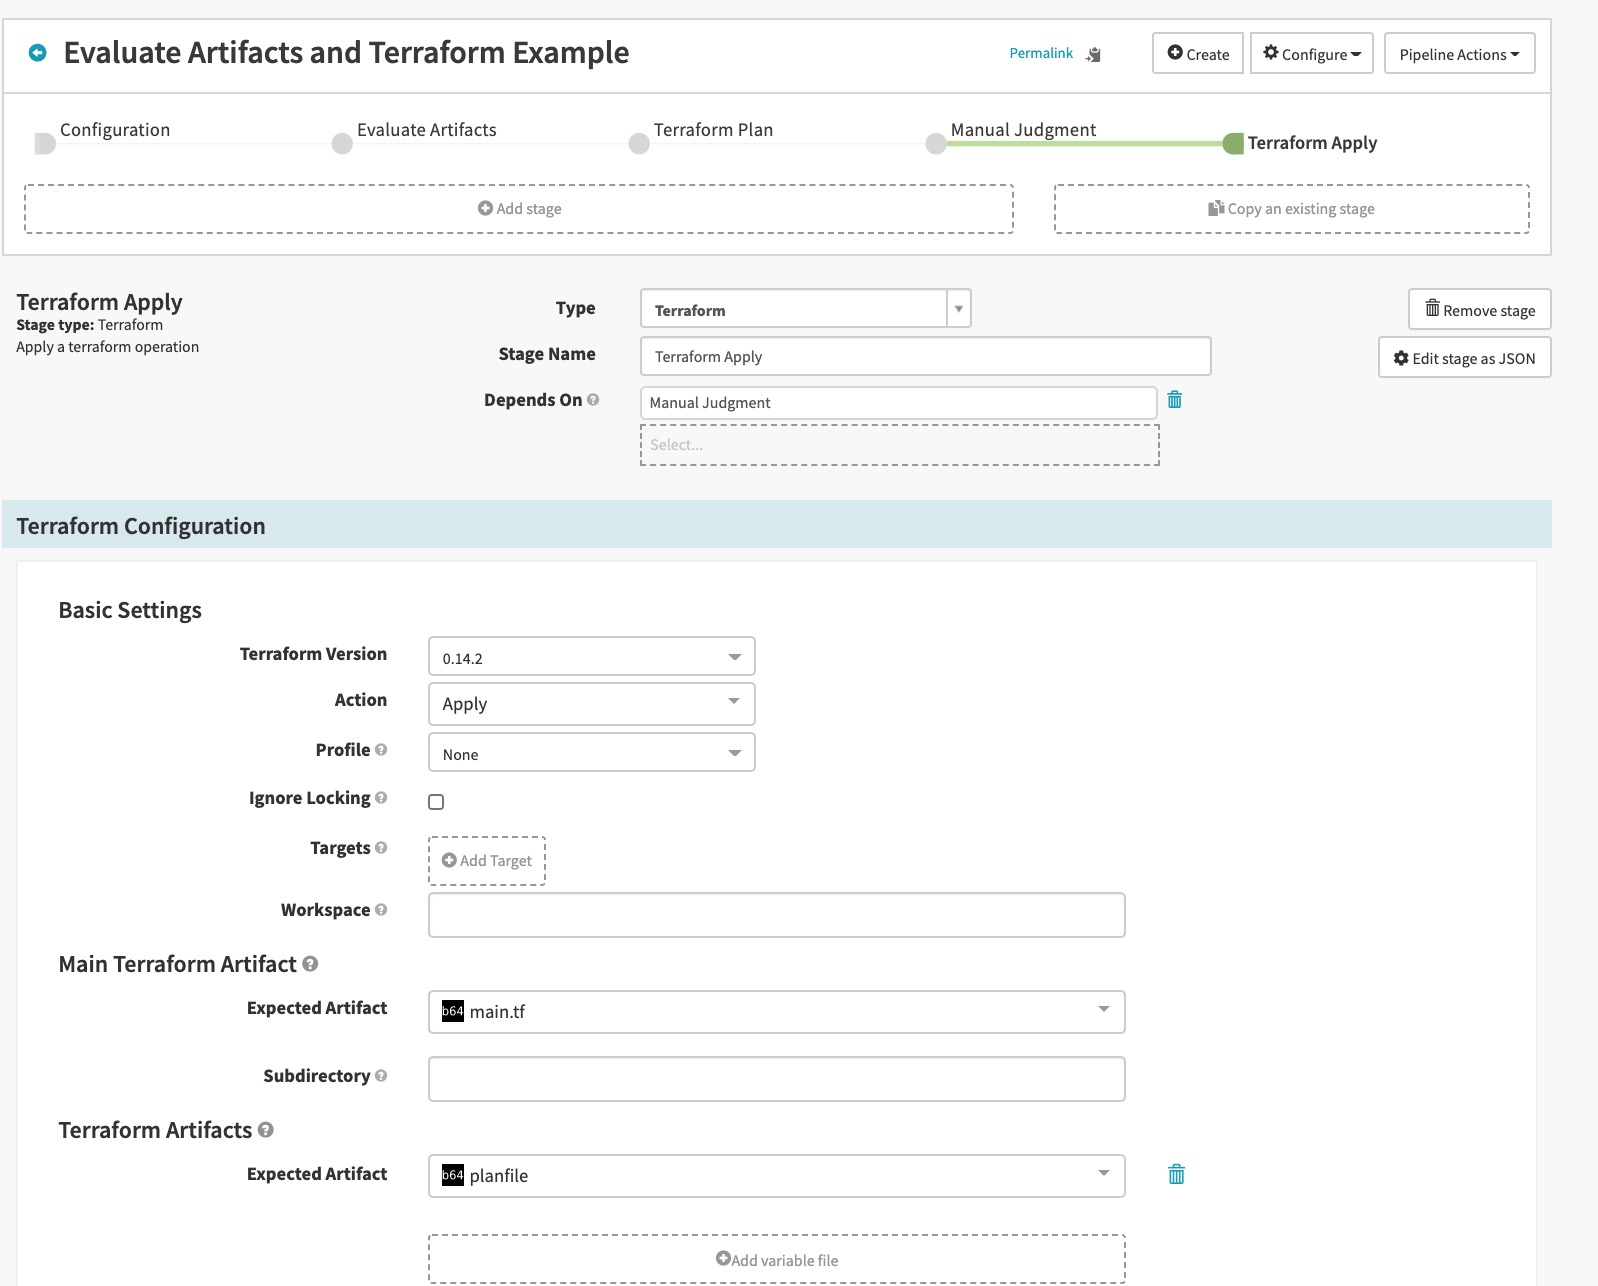
- Add a second Terraform stage with the following characteristics:
- Set the Action to Apply.
- For Main Terraform Artifact > Expected Artifact, select
main.tf. This is the Terraform script. - For Terraform Artifacts > Expected Artifact, select
planfile. This is the artifact that the Terraform Plan stage produced.
- Save your changes. This is what the complete pipeline looks like:
- Start a manual execution of the pipeline.
- The UI prompts you for values that get substitued into the pipeline:
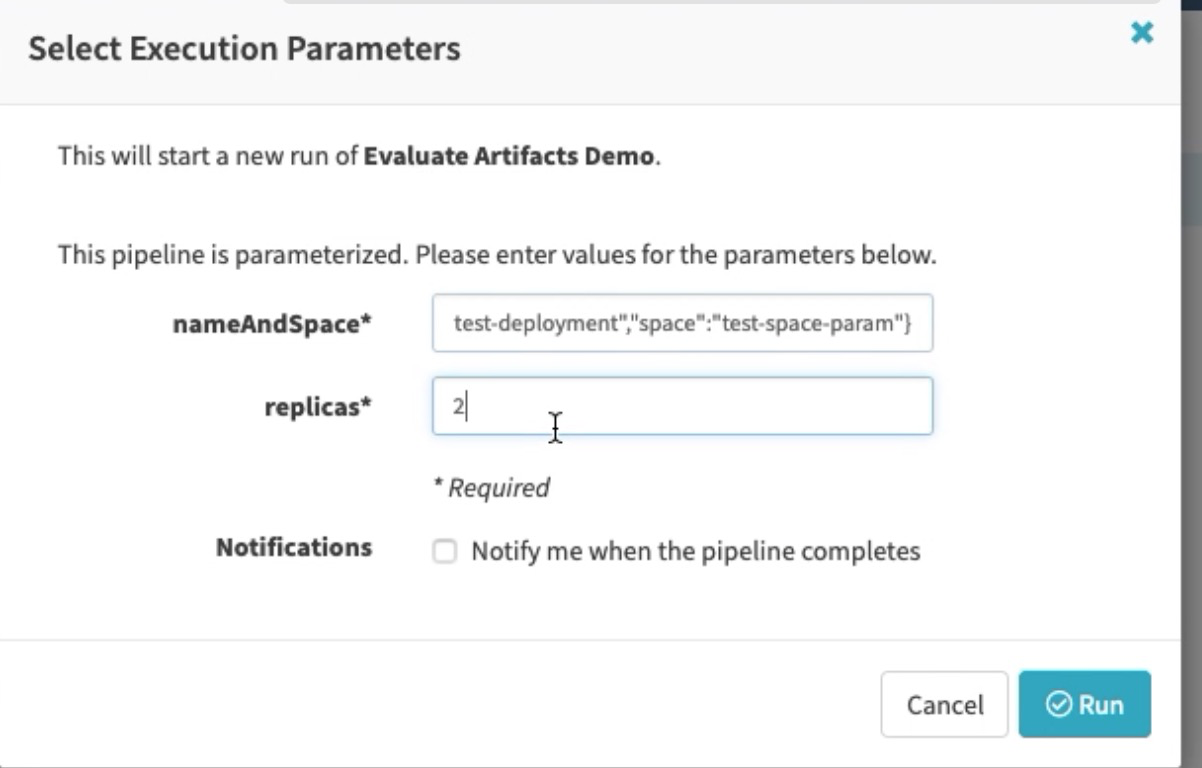
nameAndSpace: {"name":"test-deployment","space":"test-space-param"}is a SpEL expression.replicasis an integer value.
The pipeline creates values for variables in the Terraform script and the number of replicas. These are stored in a tfVar file.
- Approve the Manual Judgment stage, which then starts the Terraform apply stage.
When the pipeline completes, you can query your Kubernetes cluster: kubectl get all -namespace test-space-param. The command returns all the resources the Terraform stage created.
Known issues
Problem saving artifacts
You may run into an issue where it seems like artifacts (or changes to them) are not being saved even though you click Save Changes. This issue occurs because of how the UI handles updates to artifacts in relation to changes to other configurations.
To avoid this issue, use the following workflow when you want to modify artifacts in a stage:
- Save any changes you have made to the pipeline before you modify artifacts.
- Make changes to the artifacts for the stage.
- Wait for the status in the bottom right of the UI to change from In sync to the server to the action buttons. This wait period is important. If you make other changes before the artifact is ready, the artifact will not be saved.
- Save your changes.
- Continue making other changes.
Feedback
Was this page helpful?
Thank you for letting us know!
Sorry to hear that. Please tell us how we can improve.
Last modified March 3, 2023: (22c29bf4)