Use Pipelines-as-Code in Armory Continuous Deployment
Intended workflow
The Pipelines-as-Code feature is intended to make it much faster and easier for developers to get a brand new application up and running. The general workflow for new projects is:
- Developer creates a new project in source control
- They create a Dinghyfile to build the application and pipelines in Spinnaker (even easier if there is a Module Repo set up with a templatized set of pipelines)
- When the code is committed to the branch that the Dinghy service tracks, Armory picks up the Dinghyfile, renders it, and applies it to Spinnaker, creating the application and the pipelines.
Job done! If everything’s been configured properly, your developers should be able to deploy their code using a previously-proven pipeline model without ever having had to go into Spinnaker to configure anything.
As an added bonus, the pipeline definitions have now been saved in source control, along with the rest of the project’s files. If changes are made to the Dinghyfile, when committed/merged into the tracked branch, Spinnaker automatically updates the pipelines.
Basic format
A Dinghyfile is a JSON (or HCL or YAML, see
below) dictionary that wraps a
few top-level elements to instruct Dinghy where to create/update the
pipelines that are being defined. This outer layer identifies the
application that the pipelines should live in. Dinghy creates
the application if it doesn’t already exist. You can also provide
settings for the application within this file as well. Finally, the
pipelines key is an array of pipeline definitions that will be
created/updated in that application.
Here is an example Dinghyfile:
{
  "application": "helloworldapp",
  "globals": {
    "save_app_on_update": true
  },
  "spec": {
    "appmetadata": {
      "dataSources": {
        "enabled": [
          "securityGroups",
          "loadBalancers",
          "executions",
          "serverGroups"
        ],
        "disabled": [
          "canaryConfigs"
        ]
      },
      "cloudProviders": [
        "kubernetes",
        "aws"
      ],
      "customBanners": [
        {
          "backgroundColor": "var(--color-alert)",
          "enabled": true,
          "text": "Your custom banner text",
          "textColor": "var(--color-text-on-dark)"
        }
      ]
    }
  },
  "pipelines": [
    {
      "application": "helloworldapp",
      "name": "my-pipeline-name",
      "stages": [
        {
          "name": "one",
          "type": "wait",
          "waitTime": 10
        }
      ]
    }
  ]
}
Make sure you specify the following fields so that the Dinghyfile can create a pipeline with stages:
.application: The name of the application where pipelines will be created or updated. If the application does not exist, it will be created..globals: Configuration used to define top-level variables. See top-level variables for more information..globals.save_app_on_update: Flag that allows updates to application properties. See Application updates for more information..appmetadata: Key/value pairs where you can define application metadata, such as whether Canary analysis is enabled. You can retrieve a list of potential configs by opening the developer console for your browser when viewing the Config page of an application. Look for the possible parameters under thespinnaker.application.attributeskey. Note that no validation is done for this field..appmetadata.dataSources.enabled: An array of features that will be displayed on Armory Continuous Deployment..appmetadata.dataSources.disabled: An array of features that will not be displayed on Armory Continuous Deployment..appmetadata.customBanners[*]: An array of banners that will be displayed on Armory Continuous Deployment. Must only have one item checked as enabled..appmetadata.cloudProviders[*]: An array of cloud providers for the application..pipelines: An array of pipelines; each item defines a pipeline within the pipeline. You can have zero, one, or more pipelines in a Dinghyfile..pipelines[*].application: The name of the application where pipelines will be created or updated. It must match the top-level.applicationfield..pipelines[*].name: The name of the pipeline..pipelines[*].stages: An array of stages that make up the pipeline.
Stage fields
Each pipeline should have a field called stages, which is an array of the definitions of the stages that make up the pipeline. Each stage definition should have these fields:
name(string): The name of the stage. This can be any string.type(string): The type of the stage. Must match a stage type; the types available depend on Armory Continuous Deployment’s configuration. For example, AWS stages can only be used if the AWS provider is enabled.refId(string): A locally unique string that identifies the stage. It is often (but not necessarily) numerical.requisiteStageRefIds(array of strings): The list of stages that must complete before this stage runs, referenced by theirrefId. See the Stage Dependency Graph section for details.
In addition to the above, this is a non-exhaustive list of fields supported on all stage types:
stageEnabled(string): Spring Expression Language expression; if this is set, the stage will only continue if this expression evaluates to non-false.comments(string): Comments for the stage, which are visible when viewing the state of the stage.sendNotifications(boolean): Whether to notify on the notifications configurations. Used in conjunction with thenotificationsfield.notifications(array): An array of notification settings, to be used to notify on stage conditions. Used in conjunction with thesendNotificationsarray.completeOtherBranchesThenFail(boolean): If set to true, the following happens when the stage fails: other branches will be allowed to complete, but the pipeline as a whole fails.continuePipeline(boolean): If set to true, continue the current branch of the pipeline even if the stage fails.failPipeline(boolean): If set to true, fail the whole pipeline immediately if the stage fails.failOnFailedExpressions(boolean): If set to true, fail the stage if it contains invalid Spring Expression Language.restrictExecutionDuringTimeWindow(boolean): If set to true, only run the stage during whitelisted execution windows (indicated in therestrictedExecutionWindowobject).restrictedExecutionWindow(object): A set of fields used to control when the stage is allowed to run. By default, stages are unrestricted. Used in conjunction withrestrictExecutionDuringTimeWindow.
Additionally, each stage type supports one or more stage-specific fields. For example, the wait stage type has an integer field called waitTime, which is the number of seconds the stage will wait.
Additional stage fields can be identified by configuring the stage through the UI and examining the Stage JSON that gets generated.
Stage dependency graph
While a JSON array is an ordered list, the order of the stages in your pipeline’s stages array isn’t used for stage order. Instead, Spinnaker stages each have a refId, a unique string within the pipeline that identifies the stage and an array of stages that the stage depends on. Note that refId is often a numerical value but does not need to be one. For example, this is a four-stage pipeline:
{
"application": "helloworld",
"pipelines": [
  {
    "application": "helloworld",
    "name": "my-pipeline-name",
    "stages": [
      {
        "name": "one",
        "type": "wait",
        "waitTime":  10,
        "refId": "first-stage",
        "requisiteStageRefIds": []
      },
      {
        "name": "two-a",
        "type": "wait",
        "waitTime":  15,
        "refId": "my-second-stage",
        "requisiteStageRefIds": [
          "first-stage"
        ]
      },
      {
        "name": "two-b",
        "type": "wait",
        "waitTime":  30,
        "refId": "my-other-second-stage",
        "requisiteStageRefIds": [
          "first-stage"
        ]
      },
      {
        "name": "last",
        "type": "wait",
        "waitTime":  20,
        "refId": "my-final-stage",
        "requisiteStageRefIds": [
          "my-second-stage",
          "my-other-second-stage",
        ]
      }
    ]
  }
]
}
The above Dinghyfile defines a single pipeline with four stages. Here is how the pipeline behaves:
- The stage called
one(withrefIdfirst-stageand norequisiteStageRefIds), runs first. It will take 10 seconds to complete. - Once the stage “one” is complete, stages “two-a” and “two-b” start in parallel because they both have
first-stageas a requisite stage. This means they both depend onfirst-stagecompleting. - Stage
two-awill complete in fifteen seconds. - Stage
two-b, which started at the same, will complete in thirty seconds (fifteen seconds after stage “two-a” completes). - Stage
last, which depends on bothtwo-aandtwo-b(identified by theirrefIdsofmy-second-stageandmy-other-second-stage), starts once both stagetwo-aandtwo-bare complete.
Application permissions
You can define in the spec block the permissions to set on the application.
The items in the spec field only apply if they are defined for a new
Spinnaker application. One note of caution here, if you set the WRITE
permissions to a group that the Dinghy service is NOT part of, Dinghy will not
be able to update anything within that application. Pipelines will not get created
or updated.
Here’s an example Dinghyfile that has no pipelines but creates an application named mynewapp along with a few options:
{
  "application": "mynewapp",
  "pipelines": [],
  "spec": {
    "permissions": {
      "READ": [ "myproductteam", "mysalesteam" ],
      "EXECUTE": [ "mydevteam" ],
      "WRITE": [ "mydevopsteam" ]
    }
  }
}
Note that only the application and pipelines keys are required; everything else is optional.
Primitives
- Modules: These are templates that define a Stage/Task in the pipeline. They are kept in a single GitHub repo that is configurable when the dinghy service starts. eg:
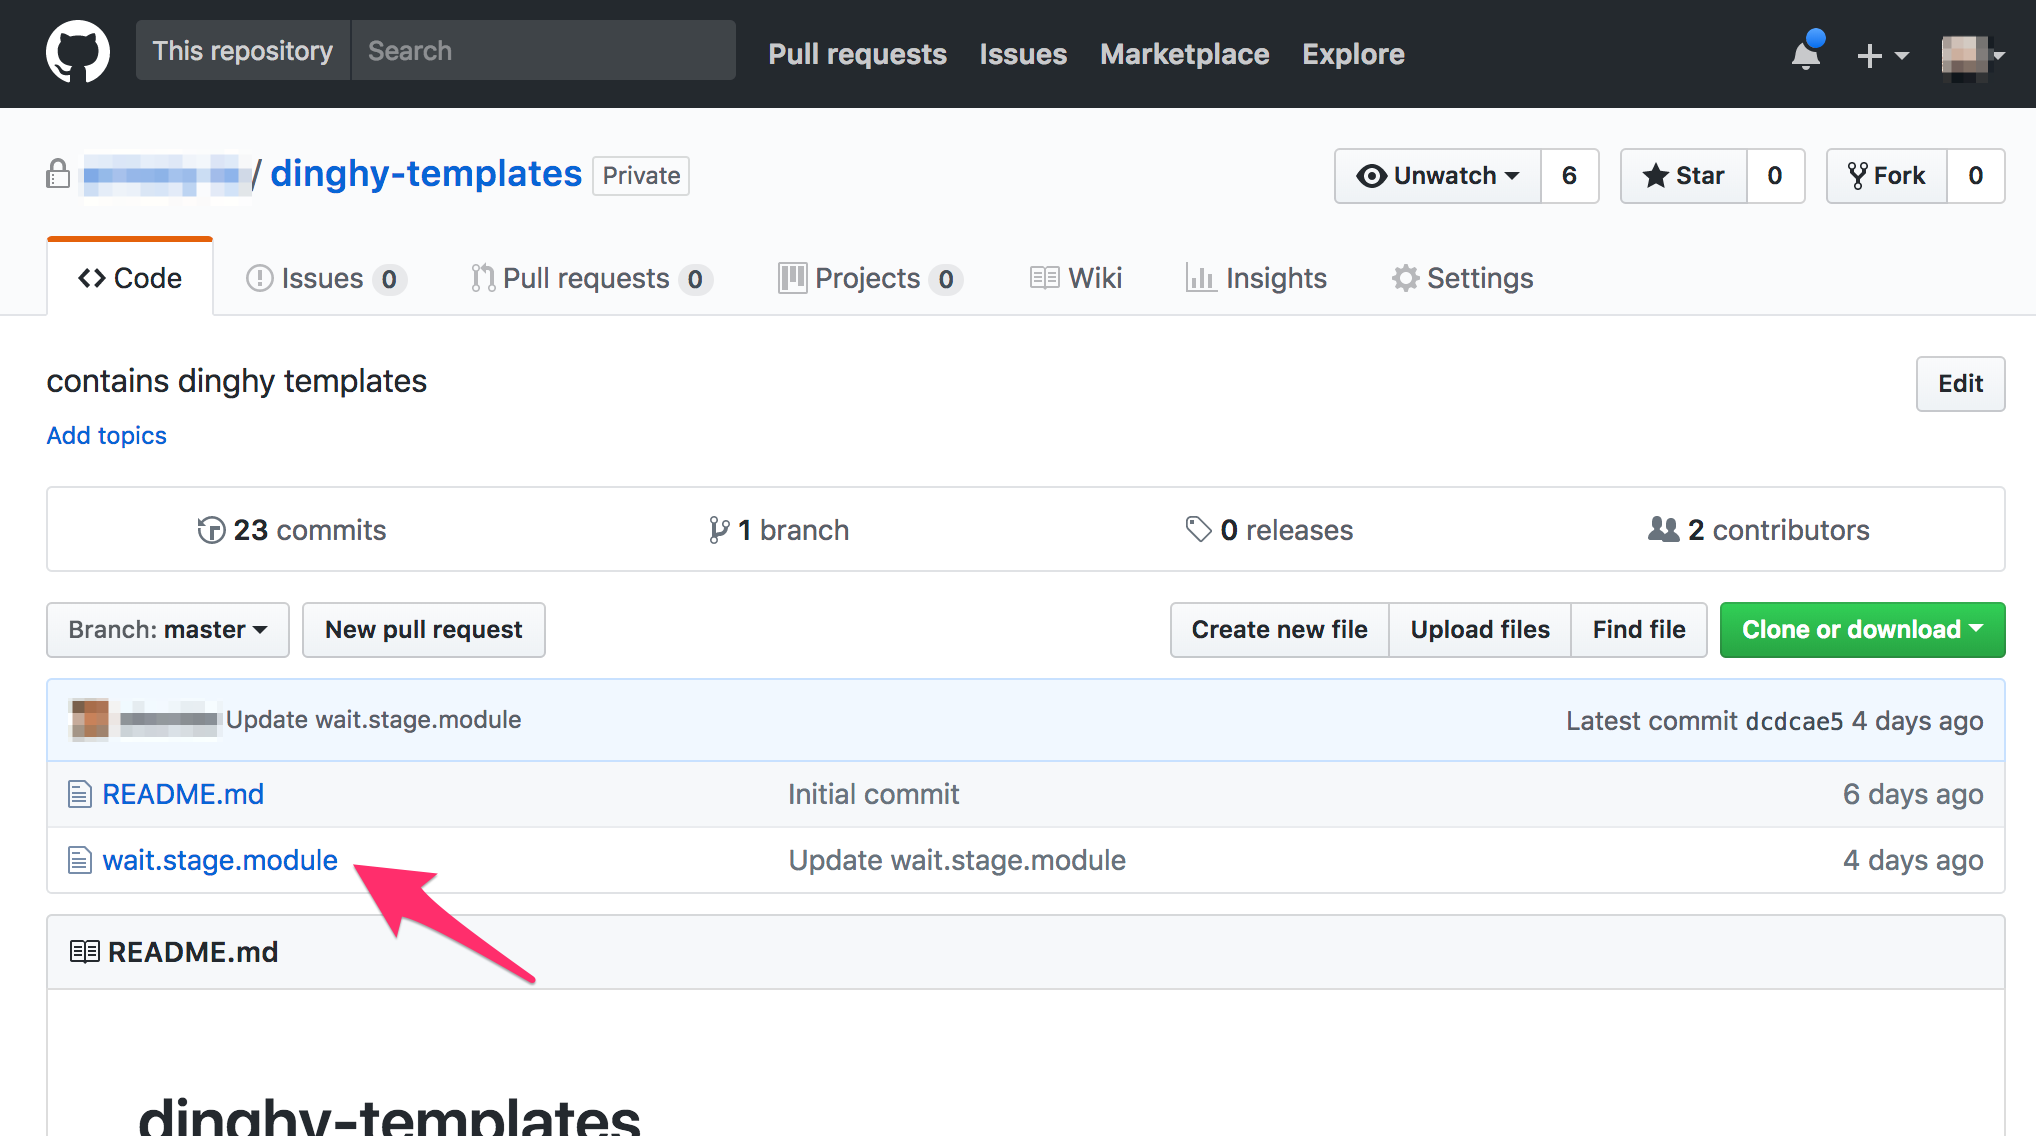
They are JSON files with replacable values in them. e.g., a module that defines a wait stage in a pipeline might look like:
{
    "name": "Wait",
    "refId": "1",
    "requisiteStageRefIds": [],
    "type": "wait",
    "waitTime": 42
}
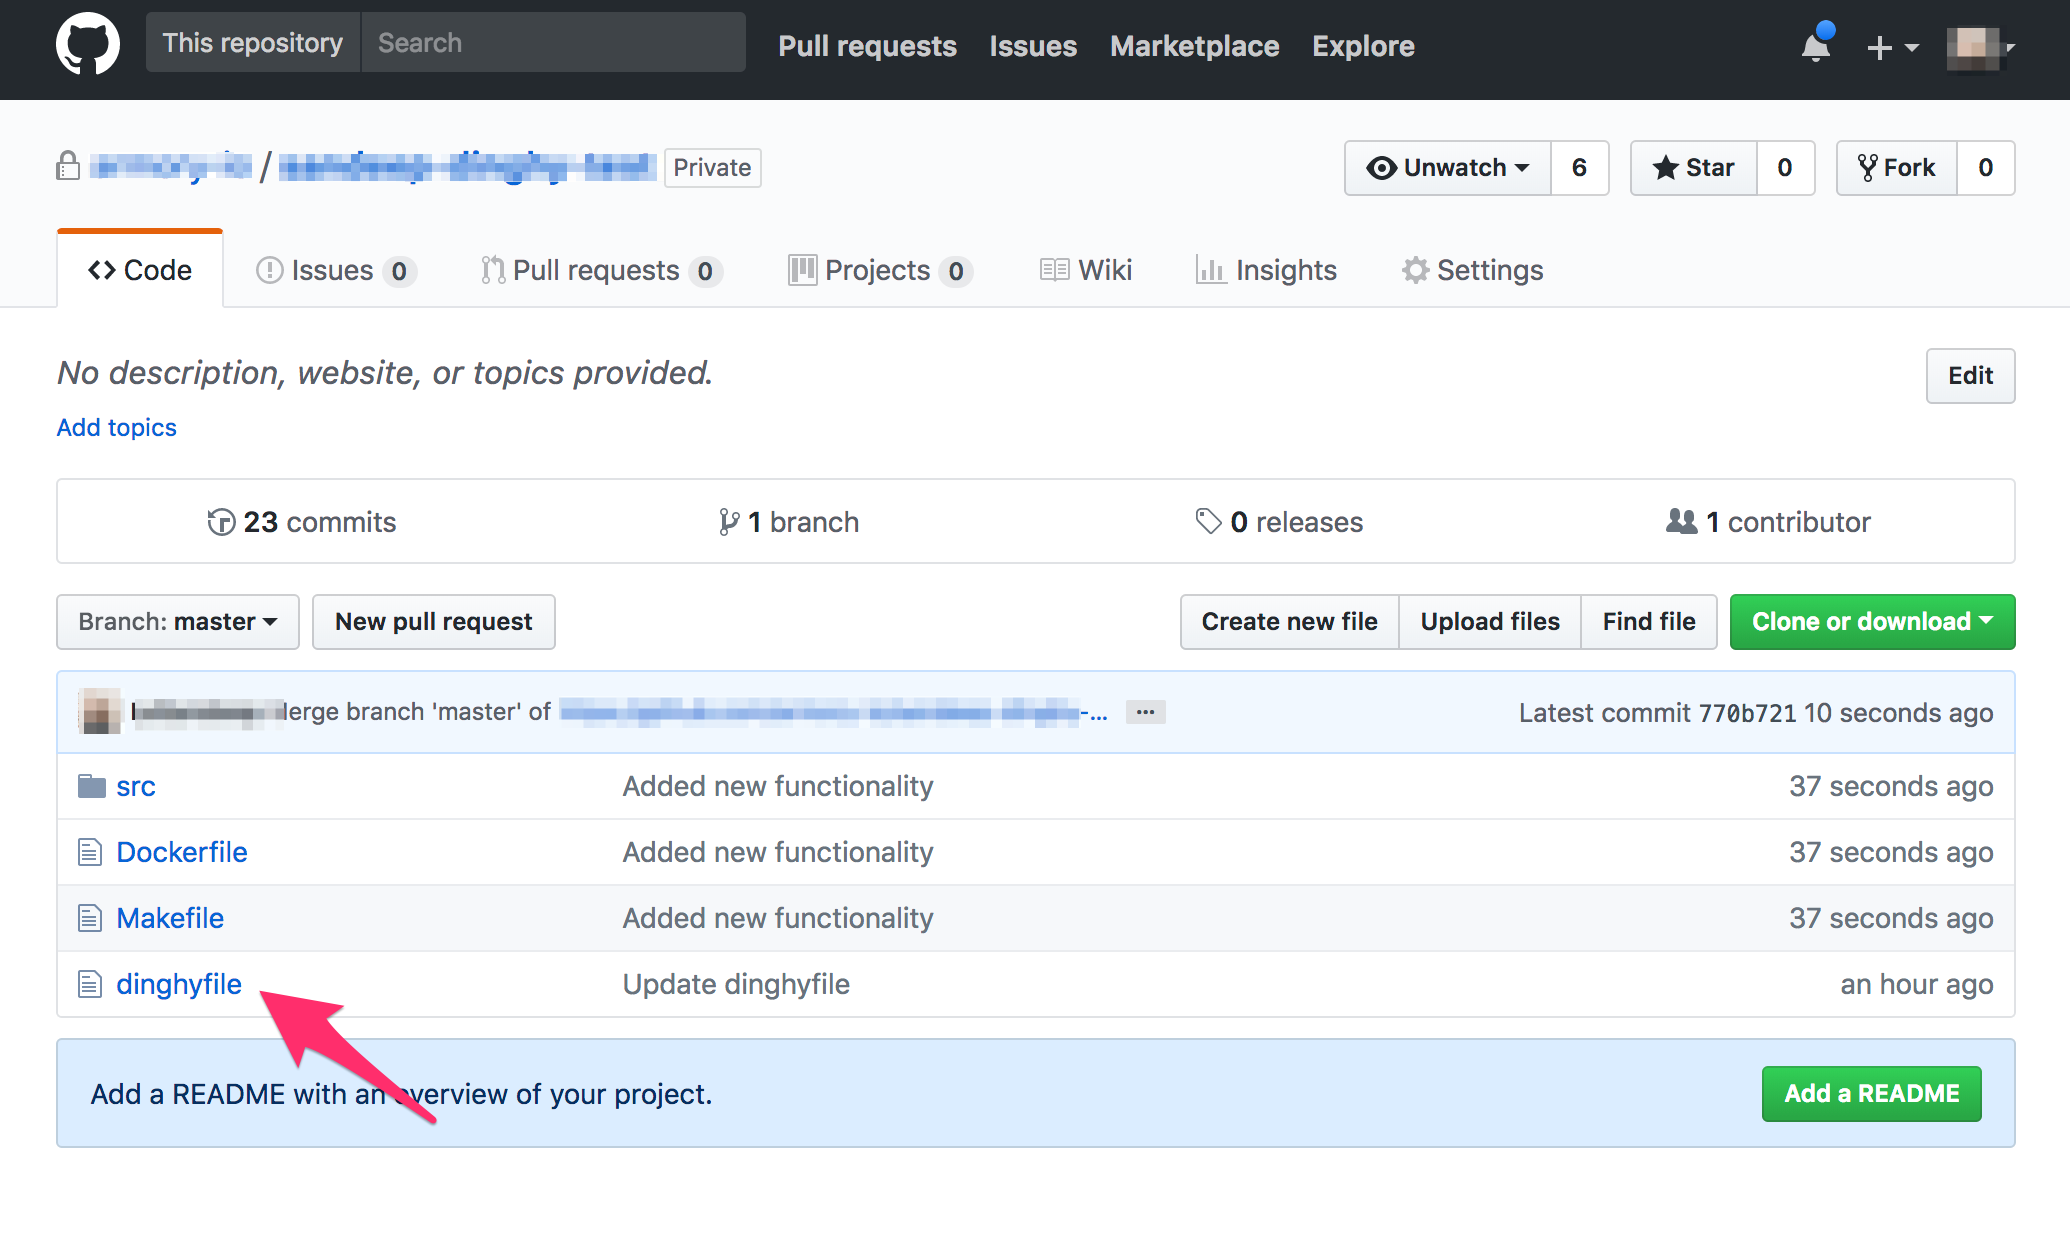
- Pipeline definitions: These define a pipeline for an application in a file called
dinghyfile. Thedinghyfileusually resides at the root level of the application repo. eg:
You can compose stage/task templates to make a full definition. e.g., a Pipeline definition that has a single wait stage might look like:
{
  "application": "yourspinnakerapplicationname",
  "pipelines": [
    {
      "application": "yourspinnakerapplicationname",
      "keepWaitingPipelines": false,
      "limitConcurrent": true,
      "name": "Made By Armory Pipeline Templates",
      "stages": [
        {
          "name": "Wait",
          "refId": "1",
          "requisiteStageRefIds": [],
          "type": "wait",
          "waitTime": 10
        }
      ],
      "triggers": []
    }
  ]
}
Template variables and substitution
Pipeline definitions can include Modules defined in another GitHub Repo. e.g.:
{
  "application": "yourspinnakerapplicationname",
  "pipelines": [
    {
      "application": "yourspinnakerapplicationname",
      "keepWaitingPipelines": false,
      "limitConcurrent": true,
      "name": "Made By Armory Pipeline Templates",
      "stages": [
        {{ module "wait.stage.module" }} // Module created in dinghy-templates repo
      ],
      "triggers": []
    }
  ]
}
Note that modules can be stored on a subfolder of your repository. To reference these modules, add a snippet like the following:
{{ module "my/path/to/module/wait.stage.module" }}
Using the path “/my/path/to/module/wait.stage.module” with a leading slash (
/)is not supported in Armory 2.19.8 and earlier.
The {{ module "wait.stage.module" }} takes the wait.stage.module file inside the dinghy-templates repo, and includes it in the current template. Note that modules are simply text inserted into the JSON they are referenced by; if you wanted to add another stage after the module in the example above, you would need to add the comma after the substitution so the resulting JSON was correct.
We can also pass variables to our modules like so:
{
  "application": "yourspinnakerapplicationname",
  "pipelines": [
    {
      "application": "yourspinnakerapplicationname",
      "keepWaitingPipelines": false,
      "limitConcurrent": true,
      "name": "Made By Armory Pipeline Templates",
      "stages": [
        {{ module "wait.stage.module" "waitTime" 200 }} // Pass the "waitTime" variable with value 200 to wait.stage.module
      ],
      "triggers": []
    }
  ]
}
Any number of variables can be passed to a module by simply specifying them as arguments, e.g.: {{ module “wait.stage.module” “waitTime” 100 “name” “simpleWait” }}`.
Inside wait.stage.module, we can then include these variables inline:
{
  "name": "{{ var "name" ?: "defaultname" }}",
  "refId": "1",
  "requisiteStageRefIds": [],
  "type": "wait",
  "waitTime": {{ var "waitTime" ?: 10 }}
}
The {{ var }} function is used to access variables passed to the {{ module }} call.
The first parameter is the variable name: {{ var "waitName" }}
Optionally, you can include a default parameter: {{ var "waitName" ?: "defaultValue" }}.
Let us create a more realistic pipeline using templates. One that would look like this:
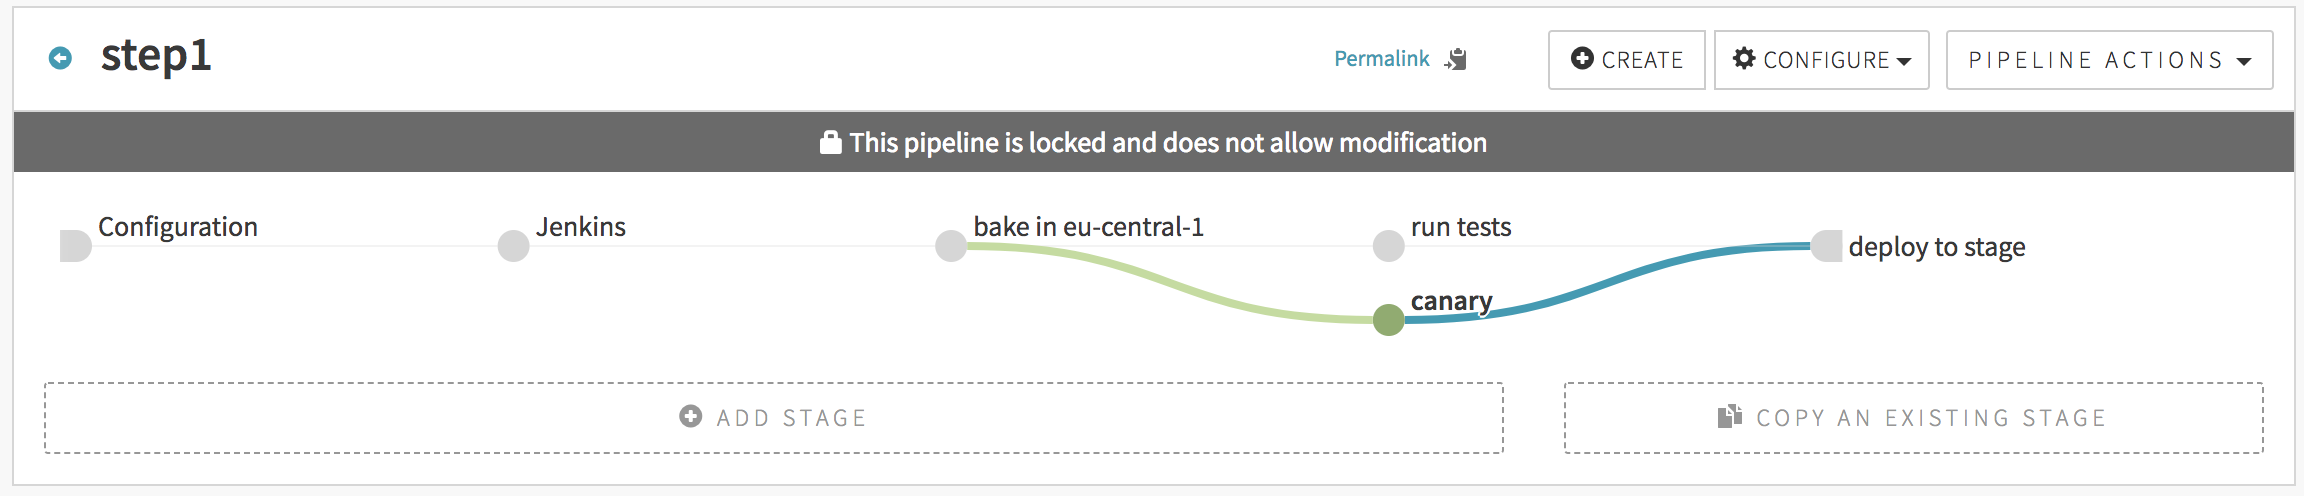
You would use the following JSON to create such. Note that any of the stages could have come from an imported module, but we show the full JSON here for readability:
{
  "application": "yourspinnakerapplicationname",
  "pipelines": [
    {
      "application": "yourspinnakerapplicationname",
      "keepWaitingPipelines": false,
      "limitConcurrent": true,
      "name": "step1",
      "stages": [
        {
          "continuePipeline": false,
          "failPipeline": true,
          "isNew": true,
          "job": "armory/job/armory-hello-deploy/job/master",
          "master": "Armory Jenkins",
          "name": "Jenkins",
          "parameters": {},
          "refId": "105",            // a unique id that's unique between pipelines.stages[*].refId
          "requisiteStageRefIds": [],
          "type": "jenkins"
        },
        {
          "baseLabel": "release",
          "baseOs": "ubuntu",
          "cloudProviderType": "aws",
          "extendedAttributes": {},
          "isNew": true,
          "name": "bake in eu-central-1",
          "package": "myapp_1.27-h343",
          "refId": "101",
          "regions": [
             "eu-central-1"
          ],
          "requisiteStageRefIds": [
            "105"      // this means: stage "105" comes before this stage
          ],
          "storeType": "ebs",
          "type": "bake",
          "user": "LeSandeep",
          "vmType": "hvm"
        },
        {
          "failPipeline": true,
          "isNew": true,
          "name": "run tests",
          "refId": "102",
          "requisiteStageRefIds": [
            "101"
          ],
          "type": "script",
          "user": "LeSandeep",
          "waitForCompletion": true
        },
        {
          "isNew": true,
          "name": "canary",
          "refId": "103",
          "requisiteStageRefIds": [
            "101"
          ]
        },
        {{ module deploy.stage.module "requisiteStageRefIds" ["102", "103"] }}
      ],
      "triggers": []
    }
  ]
}
The file deploy.stage.module would look like this:
{
  "clusters": [],
  "isNew": true,
  "name": "deploy to stage",
  "refId": "104",
  "requisiteStageRefIds": {{ var "requisiteStageRefIds" ?: [] }},
  "type": "deploy"
}
Multiple level inheritance
In the below example, we show a pipeline that is created with multiple levels of module inheritance. The application’s dinghyfile looks like this:
{
  "application": "dinghytest",
  "pipelines": [
    {{ module "simple.pipeline.module" "application" "dinghytest" }}
  ]
}
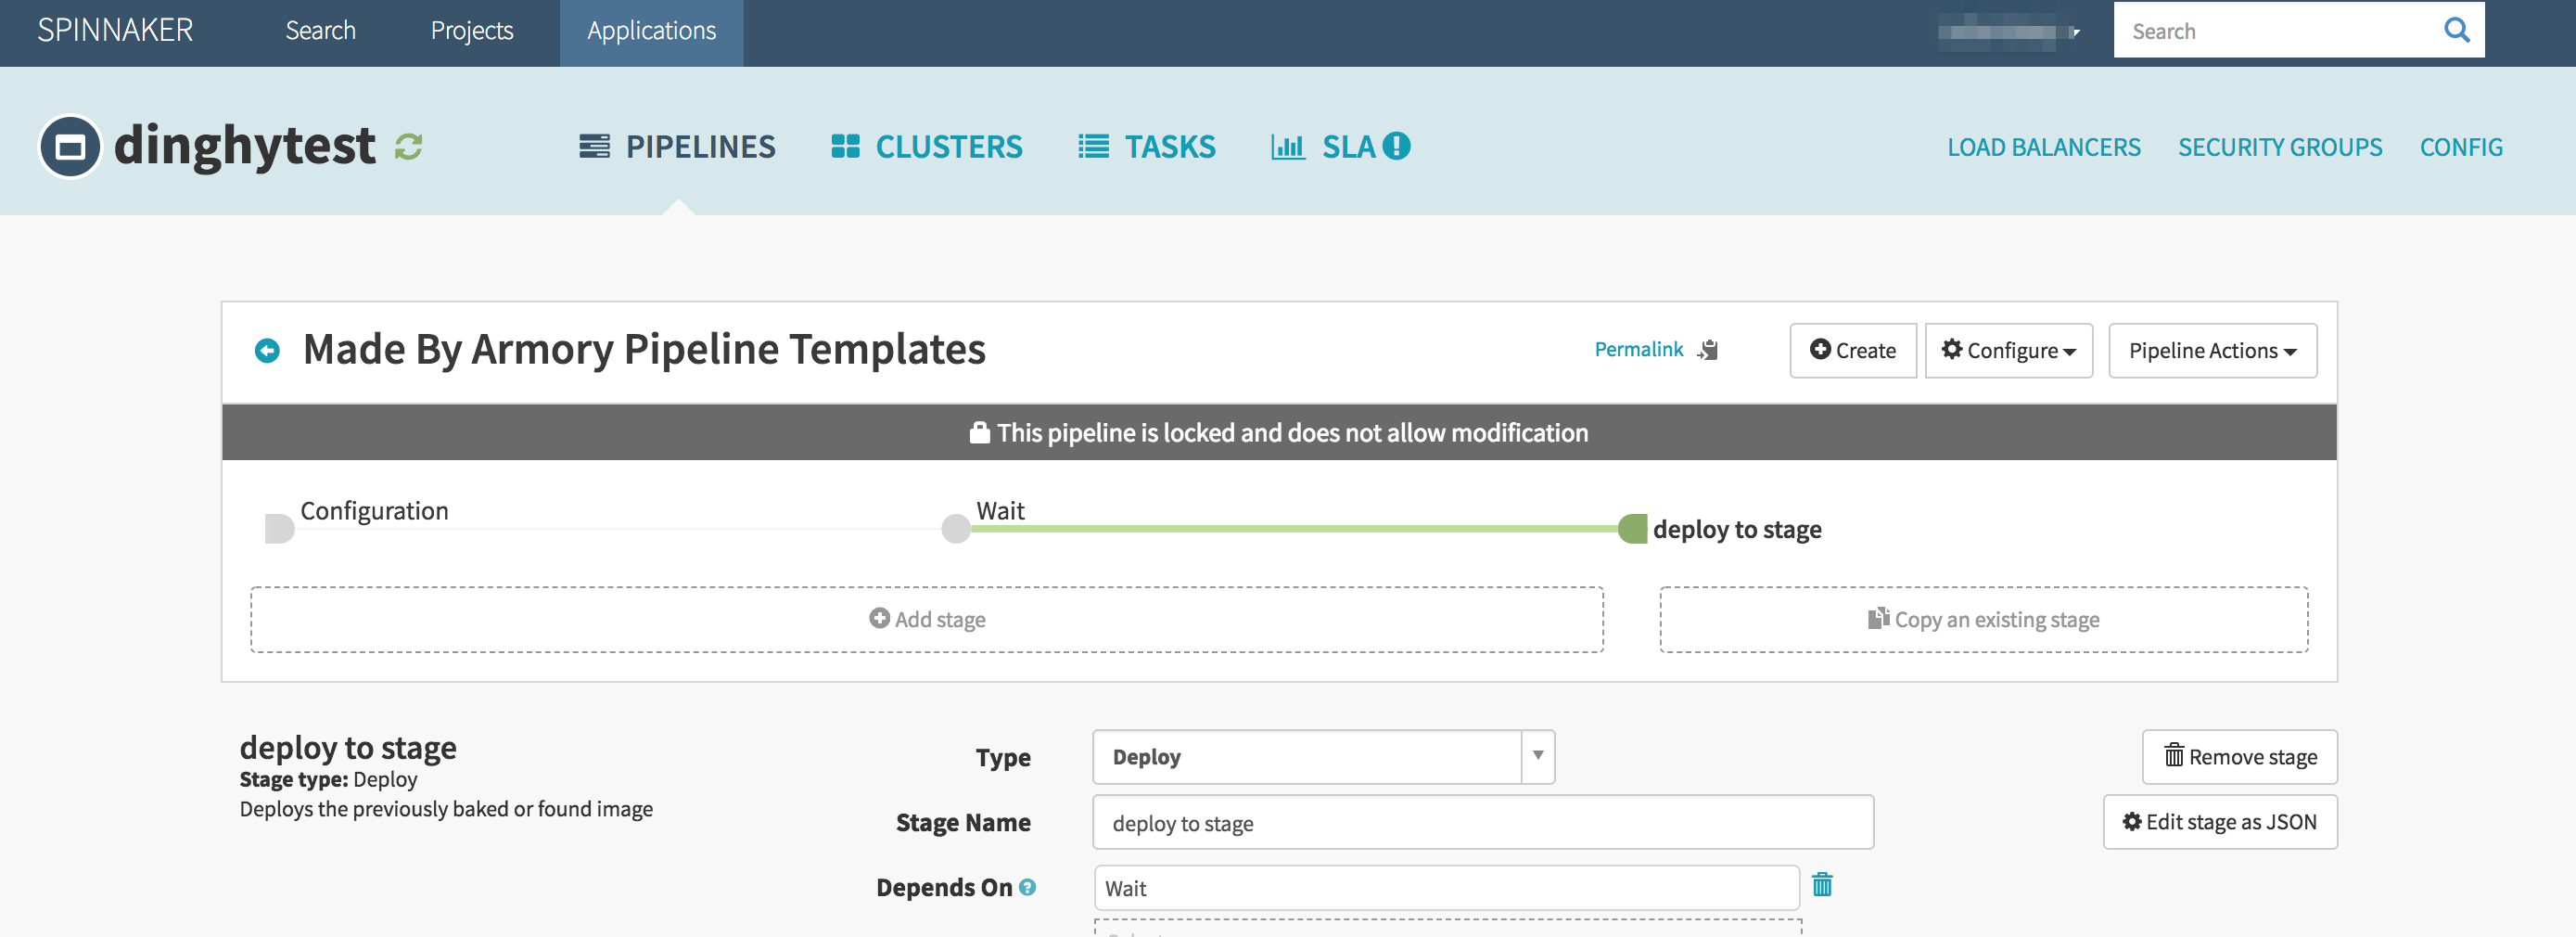
The dinghyfile inherits its pipeline from a module named simple.pipeline.module that looks as shown below. Note that it also overrides the application name in the module to avoid conflict.
It is worth noting in the below example, where we are substituting a string variable, the call to
{{ var ... }}is also surrounded by quotes, unlike when substituting non-string variables (ie, int, array, json…)
{
  "application": "{{ var "application" ?: "yourspinnakerapplicationname" }}",
  "keepWaitingPipelines": false,
  "limitConcurrent": true,
  "name": "Made By Armory Pipeline Templates",
  "stages": [
    {{ module "wait.stage.module" "waitTime" 200 }},
    {{ module "deploy.stage.module" "requisiteStageRefIds" ["1"] }}
  ],
  "triggers": []
}
This module inherits two stages and overrides variables within them. The wait.stage.module is same as the one shown above. The deploy.stage.module looks like this:
{
  "clusters": [],
  "isNew": true,
  "name": "deploy to stage",
  "refId": "104",
  "requisiteStageRefIds": {{ var "requisiteStageRefIds" ?: [] }},
  "type": "deploy"
}
Note how the requisiteStageRefIds is overwritten while calling the module so that the deploy stage depends on the wait stage. This pipeline would look like this in the spinnaker UI:
Local module functionality
Depending on how long your dinghyfiles are, consider using a local module instead of a module.
Local modules behave exactly the same as modules but with a couple differences:
- The location of the file. A module needs to exist in the configured template repository. A local module does not. Instead, the local module file needs to be inside the repository that you used to make the push. Given the following scenario:
- An end user must update the
dinghyfilein order to pull new updates from modules it is using.
my_repository:
.
├── dinghyfile
└── local_modules
    └── stage.minimal.wait.localmodule
template_repository:
.
└── stage.minimal.wait.module
Inside the dinghyfile, stage.minimal.wait.localmodule and stage.minimal.wait.module you can see this.
dinghyfile:
{
  "application": "localmodules",
  "globals": {
      "waitTime": "42",
      "waitname": "localmodule default-name"
  },
  "pipelines": [
    {
      "application": "localmodules",
      "name": "Made By Armory Pipeline Templates",
      "stages": [
        {{ local_module "/local_modules/stage.minimal.wait.localmodule" }},
        {{ local_module "/local_modules/stage.minimal.wait.localmodule" "waitname" "localmodule overwrite-name" "waitTime" "100" }},
        {{ module "stage.minimal.wait.module" "waitname" "global module overwrite-name" "waitTime" "100" }}
      ]
    }
  ]
}
stage.minimal.wait.localmodule and stage.minimal.wait.module have the same content:
{
  "name": "{{ var "waitname" ?: "Local Module Wait" }}",
  "waitTime":  "{{ var "waitTime" ?: 10 }}",
  "type": "wait"
}
The rendered file looks like this:
{
  "application": "localmodules",
  "globals": {
    "waitTime": "42",
    "waitname": "localmodule default-name"
  },
  "pipelines": [
    {
      "application": "localmodules",
      "name": "Made By Armory Pipeline Templates",
      "stages": [
        {
          "name": "localmodule default-name",
          "waitTime": "42",
          "type": "wait"
        },
        {
          "name": "localmodule overwrite-name",
          "waitTime": "100",
          "type": "wait"
        },
        {
          "name": "global module overwrite-name",
          "waitTime": "100",
          "type": "wait"
        }
      ]
    }
  ]
}
Note that you can use both local modules and modules in one dinghyfile.
Using local modules and modules
As shown in the previous example, you can use a local module and module without any issues from any dinghyfile. The rendering functionality is implemented in the Armory CLI tool, so you can validate your dinghyfiles with local module.
Local modules limitations
You can reference module and local_module from any local module. However, you cannot call a local_module from a module. Given this scenario:
my_repository:
.
├── dinghyfile
└── local_modules
    └── stage.minimal.wait.localmodule
template_repository:
.
└── stage.minimal.wait.module
And inside the dinghyfile, stage.minimal.wait.localmodule and stage.minimal.wait.module you can see this.
dinghyfile
{
  "application": "localmodules",
  "globals": {
      "waitTime": "42",
      "waitname": "localmodule default-name"
  },
  "pipelines": [
    {
      "application": "localmodules",
      "name": "Made By Armory Pipeline Templates",
      "stages": [
        {{ module "stage.minimal.wait.module" }}
      ]
    }
  ]
}
stage.minimal.wait.module:
{
  "name": "{{ var "waitname" ?: "Local Module Wait" }}",
  "waitTime":  "{{ var "waitTime" ?: 10 }}",
  "type": "wait"
},
{{ local_module "/local_modules/stage.minimal.wait.localmodule" }}
When the Pipelines-as-Code service (Dinghy) sees that there’s a local module being sent inside a module, it throws the following error message: calling local_module from a module is not allowed. For the given example scenario, the following error occurs:
Parsing dinghyfile failed: template: dinghy-render:12:11: executing "dinghy-render" at <module "stage.minimal.wait.module">: error calling module: error rendering imported module 'stage.minimal.wait.module': template: dinghy-render:6:3: executing "dinghy-render" at <local_module "/local_modules/stage.minimal.wait.localmodule">: error calling local_module: /local_modules/stage.minimal.wait.localmodule is a local_module, calling local_module from a module is not allowed
Deleting stale pipelines
If you want any pipelines in the spinnaker application that are not part of the dinghyfile to be deleted automatically when the dinghyfile is updated, then you can set deleteStalePipelines to true in the JSON like so:
{
  "application": "yourspinnakerapplicationname",
  "deleteStalePipelines": true,
  "pipelines": [
  ]
}
Triggering other pipelines with a stage
The spinnaker pipeline stage allows you to trigger other pipelines. However, typically you need the UUID of the pipeline to be triggered. To make it easier to write dinghy templates, we have a pipelineID function which can be used in dinghyfiles to trigger pipelines. Consider the below example (pipeline.stage.module):
{
  "application": "pipelineidexample",
  "failPipeline": true,
  "name": "Pipeline",
  "pipeline": "{{ pipelineID "default-app" "default-pipeline" }}",
  "refId": "1",
  "requisiteStageRefIds": [],
  "type": "pipeline",
  "waitForCompletion": true
}
In the above example, we are triggering a pipeline by the name default-pipeline under default-app spinnaker application. The app name and the pipeline name can be overwritten when calling this module. At any higher level, simply pass in "triggerApp" and "triggerPipeline" like so: {{ module "pipeline.stage.module" "triggerApp" "pipelineidtest" "triggerPipeline" "testpipelinename" }}
Advanced features
Monorepo
Dinghy supports multiple spinnaker applications under the same git repo. eg:
monorepo/
├── app1
│   ├── bin
│   ├── lib
│   ├── pkg
│   └── src
│       ├── app1.go
│       └── dinghyfile
└── app2
    ├── bin
    ├── lib
    ├── pkg
    └── src
        ├── app2.go
        └── dinghyfile
Notice both app1 and app2 are under the same repo, each app has its own dinghyfile and its own spinnaker application that can be referenced in the dinghyfile.
Template validation
If, while rendering a dinghyfile, a malformed JSON file is encountered, the logs should indicate the line number and the column number of the error. The arm cli can be used to validate dinghyfiles and modules locally without having to put them in source control.
Armory CLI: https://github.com/armory-io/arm
Newlines
For ease of readablilty, you can split a single call to module across multiple lines. For example, the following two dinghyfiles are both valid & produce identical pipelines in Spinnaker:
{
  "application": "yourspinnakerapplicationname",
  "pipelines": [
    {
      "application": "yourspinnakerapplicationname",
      "name": "Made By Armory Pipeline Templates",
      "stages": [
        {{ module "wait.stage.module" "name" "wait-for-cache-warm-up" "waitTime" 42 }}
      ]
    }
  ]
}
{
  "application": "yourspinnakerapplicationname",
  "pipelines": [
    {
      "application": "yourspinnakerapplicationname",
      "name": "Made By Armory Pipeline Templates",
      "stages": [
        {{
           module "wait.stage.module"
           "name" "wait-for-cache-warm-up"
           "waitTime" 42
        }}
      ]
    }
  ]
}
Top-level variables
When passing in variables to modules, you have the option of defining variables at the top-level dinghyfile like so:
{
  "application": "yourspinnakerapplicationname",
  "globals": {
      "waitTime": "42",
      "name": "default-name"
  },
  "pipelines": [
    {
      "application": "yourspinnakerapplicationname",
      "name": "Made By Armory Pipeline Templates",
      "stages": [
        {{ module "wait.stage.module" }}
      ]
    }
  ]
}
In the above example, the variables waitTime and name (used inside wait.stage.module) are defined at the top level, and not explicitly defined when the call to wait.stage.module is made.
Note that top-level variables are overwritten by variables in the call to module if both are present. For instance, in the below example, the waitTime after the dinghyfile is rendered would be 43:
{
  "application": "yourspinnakerapplicationname",
  "globals": {
      "waitTime": "42",
      "name": "default-name"
  },
  "pipelines": [
    {
      "application": "yourspinnakerapplicationname",
      "name": "Made By Armory Pipeline Templates",
      "stages": [
        {{ module "wait.stage.module" "waitTime" "43" }}
      ]
    }
  ]
}
Nested variables
Another neat little trick with variables is support for nested variables. Consider the following variable usage in a module:
"name": "{{ var "name" ?: "some-name" }}"
Here, if the variable "name" was passed in, or is a top-level variable in the dinghyfile, then use that value, or else default to some-name.
With nested variables, instead of using a hardcoded default value, the default can come from another variable. eg:
"name": "{{ var "name" ?: "@different_var" }}"
Here, if the variable "name" was not passed into the module call and is not a top-level variable in the dinghyfile, its value will come from a variable called "different_var" that is either a top-level variable or another variable passed in when the module is called. Note the @ syntax for the nested variable. The @ symbol is only used where the variable is used, not when it is passed in.
le
Create a dinghyfile from an existing pipeline
If you have already created a pipeline in the Spinnaker UI, you can create a dinghy file with some simple steps.
You need to go to the Spinnaker UI and click on the
Configureoption of the pipeline you want.Click on the
Pipeline Actionsdropdown and select ‘Edit as JSON’Copy/paste this data into a new file, you will need to wrap this JSON with the following
{
  "application": "YourSpinnakerApplicationName",
  "pipelines": [
     "name": "the name of your pipeline",
     "application": "YourSpinnakerApplicationName",
     "{ The rest of the JSON obtained from the UI }"
   ]
}
Add the following parameters to each pipeline in the collection within the root of its JSON:
"application": "YourSpinnakerApplicationName"
"name": "<the name of the pipeline you wish to create>"
Note that the value you set for
"application"must be the same as the value in step 3. For example, if your pipeline called “Wait Pipeline” has a JSON definition that looks like this:{ "isNew": true, "keepWaitingPipelines": false, "lastModifiedBy": "justin@acompany.com", "limitConcurrent": true, "stages": [ { "isNew": true, "name": "Wait", "refId": "1", "requisiteStageRefIds": [], "type": "wait", "waitTime": 30 } ], "triggers": [], "updateTs": "1572455128000" }Then a Dinghy file managing this pipeline in the “helloworld” application looks like this:
{
  "application": "helloworld",
  "pipelines": [
    {
      "application": "helloworld",
      "name": "Wait Pipeline",
      "isNew": true,
      "keepWaitingPipelines": false,
      "lastModifiedBy": "justin@acompany.com",
      "limitConcurrent": true,
      "stages": [
        {
          "isNew": true,
          "name": "Wait",
          "refId": "1",
          "requisiteStageRefIds": [],
          "type": "wait",
          "waitTime": 30
        }
      ],
      "triggers": [],
      "updateTs": "1572455128000"
    }
   ]
}
Save this file as
dinghyfilein the root of your project and push it to your repository. You may want to follow the deleting stale pipelines instructions.
Alternate template formats
When using an alternate template format all of your modules must also be in that same format.
YAML template format
YAML formatting works just like the JSON formatting does. However, all of your templates will need to be YAML if you’ve configured dinghy to use YAML as its template format.
Example:
---
application: "My awesome application"
# You can do inline comments now
globals:
  waitTime: 42
  retries: 5
pipelines:
- application: "My awesome application"
  name: "My cool pipeline"
  appConfig: {}
  keepWaitingPipelines: false
  limitConcurrent: true
  stages:
  - name: Wait For It...
    refId: '1'
    requisiteStageRefIds: []
    type: wait
    waitTime: 4
  {{ module "some.stage.module" "something" }}
  triggers: []
Note: YAML has strict spacing requirements. Your modules must indent properly for the template to be rendered correctly.
HCL template format
"application" = "Some App"
"globals" = {
    "waitTime" = 42
}
"pipelines" = [
  {
    "appConfig" = {}
      "application" = "Some App"
      "keepWaitingPipelines" = false
      "limitConcurrent" = true
      "name" = "Foo"
      "stages" = [
        {
          "name" = "Wait For It..!"
          "refId" = "1"
          "requisiteStageRefIds" = []
          "type" = "wait"
          "waitTime" = 5
        },
        {
            {{ module "some.stage.module" "something" }}
        }
      ]
      "triggers" = []
  }
]
Note: HCL format can have some quirks. Though the spec allows you to specify arrays and objects in various ways, that may not always serialize to json correctly once dinghy submits the pipeline to the Spinnaker api. The above form is recommended when specifying arrays of objects.
Conditionals
Dinghy supports all of the usual Go template conditionals. In addition to that, Dinghy also provides the git webhoook content in the template, allowing you to use the raw push data in the template itself.
Example:
{
  "application": "conditionals",
  "pipelines": [
    {
      "application": "conditionals",
      "name": "my-pipeline-name",
      "stages": [
          {
            {{ if eq .RawData.pusher.name "Samtribal" }}
              "name": "this_is_true",
            {{ else }}
              "name": "this_is_false",
            {{ end }}
            "waitTime":  10,
            "type": "wait"
          }
      ]
    }
  ]
}
Iterating over a map:
In certain situations, you may want to iterate over a list of items. Dinghy supports the makeSlice function. Here’s an example of how to do this:
Given a stage that looks like this (filename stage.minimal.wait.module)
{
  "name": "{{ var "waitname" ?: "Wait" }}",
  "type": "wait"
}
Then a Dinghyfile that looks like this (note the commas in order for the loop to function properly):
{
  "application": "example",
  "pipelines": [
    {
      "name": "Loop Example",
      "application": "example",
      "stages": [
        {{ $stages := makeSlice "First Wait" "Second Wait" }}
        {{ range $stages }}
          {{
            module "stage.minimal.wait.module"
            "waitname" .
          }},
        {{ end }}
        {{
          module "stage.minimal.wait.module"
          "waitname" "Final Wait"
        }}
      ]
    }
  ]
}
Will result in a pipeline that looks like this (after JSON formatting):
{
  "application": "example",
  "pipelines": [
    {
      "name": "Loop Example",
      "application": "example",
      "stages": [
        {
          "name": "First Wait",
          "type": "wait"
        },
        {
          "name": "Second Wait",
          "type": "wait"
        },
        {
          "name": "Final Wait",
          "type": "wait"
        }
      ]
    }
  ]
}
RawData
The top level of the data passed in is always .RawData. From there, you can use the JSON fields as they appear in the payload. For example, GitHub’s payload looks like this:
{
  "pusher": {
     "name": "Octocat"
  }
}
In the template, the access path for that variable is: .RawData.pusher.name.
{
        "application": "my fancy application (author: {{ .RawData.pusher.name }})",
        "pipelines": [
            "stages": [
                {{ $mods := makeSlice "mod1" "mod2" }}
                {{ range $mods }}
                    {{ module . }}
                {{ end }}
            ]
            {{ module "deep.pipeline.module"
                "artifact" "artifact11"
                "artifact2" "artifact22"
            }}
        ]
    }
Note: The structure of the webhook data passed to Dinghy’s template engine depends on the Git service that sends the webhook. This example uses a GitHub webhook.
Example Templates
Armory provides example dinghy templates you can copy and extend. You can find the examples in the Armory GitHub repo.
Webhook secret validation
You can add a layer of security or restrict which repositories dinghy will process by using webhook secret validation. Enabling webhook secret validation ensures that your service provider is the only one that can trigger your pipelines, not an imposter.
This feature supports GitHub webhooks.
Enable or disable webhook secret validation
When you enable webhook secret validation, ALL webhooks for that provider are validated for a secret.
Add the webhookValidationEnabledProviders element to the dinghy configuration in the SpinnakerService manifest. Add the providers as a list. To disable webhooks secrets, delete the webhookValidationEnabledProviders element with the list of providers.
apiVersion: spinnaker.armory.io/v1alpha2
kind: SpinnakerService
metadata:
  name: spinnaker
spec:
  spinnakerConfig:
    config:
      armory:
        dinghy:
          webhookValidationEnabledProviders:
          - github
          ... # Rest of config omitted for brevity
Then update the SpinnakerService with your updated manifest:
kubectl -n spinnaker apply -f spinnakerservice.yml
Webhook validation fields
When you enable webhook secret validation, Dinghy validates all the webhooks it receives from the specified provider.
A webhook validation has the following fields:
- organization: Organization for the repository.
- repo: Repository name.
- enabled: true or false.
- true: Validation will be performed against the secret in the Webhook validation.
- false: Validation for this repo will be considered as disabled, so no validation and direct dinghy execution will be done regardless secret is not good.
- secret: Secret configured.
Webhook validation default secret
You can specify a default secret to use when your GitHub organization has multiple repositories with the same secret. The repository name is default-webhook-secret and must be enabled.
- organization: Organization for the repository.
- repo: default-webhook-secret
- enabled: true
- secret: Secret configured.
Add or Edit Webhook Validations
Add the webhookValidations element to the dinghy configuration in the SpinnakerService manifest.
apiVersion: spinnaker.armory.io/v1alpha2
kind: SpinnakerService
metadata:
  name: spinnaker
spec:
  spinnakerConfig:
    config:
      armory:
        dinghy:
        webhookValidations:
        - enabled: true
          versionControlProvider: github
          organization: testorg
          repo: testrepo
          secret: testSecret
        - enabled: true
          versionControlProvider: github
          organization: armory
          repo: test-repo
          secret: testSecret
          ... # Rest of config omitted for brevity
kubectl -n spinnaker apply -f spinnakerservice.yml
Delete Webhook Validations
Delete a webhookValidations element by deleting it from the manifest and then applying the manifest.
Application updates
The Dinghy service behavior for applications and pipelines are different:
- Applications: Dinghy creates the application with the configuration initially sent. The application does not get updated after that even if the Dinghy file changes after the initial read.
- Pipelines: Any
dinghyfilesare reread on every push and update.
However, you can change this behavior by adding a global variable: save_app_on_update. This behavior is good if you want to have your application to always adhere to the code implemented since it overwrites notifications every single time.
An example of this can be:
{
    "application": "testingappupdate",
    "globals": {
        "save_app_on_update" : true
    },
    "spec": {
        "permissions": {
            "READ": [ "role"],
            "EXECUTE": [ "role" ],
            "WRITE": [ "role" ]
        },
        "notifications": {
            "slack": [
                {
                    "when": [
                        "pipeline.complete", "pipeline.failed"
                    ],
                    "address": "slack-channel"
                }
            ],
            "email": [
                {
                    "when": [
                        "pipeline.starting"
                    ],
                    "address": "email1@email.com",
                    "cc": "email2@email.com"
                }
            ]
        }
    }
}
Application notifications
Application notifications can be declared as:
{
    "application": "testingappupdate",
    "globals": {
        "save_app_on_update" : true
    },
    "spec": {
        "notifications": {
            "slack": [
                {
                    "when": [
                        "pipeline.complete", "pipeline.failed", "pipeline.starting"
                    ],
                    "message": {
                      "pipeline.starting": {
                        "text": "custom message"
                      }
                    },
                    "address": "slack-channel"
                }
            ],
            "email": [
                {
                    "when": [
                        "pipeline.starting"
                    ],
                    "address": "email1@email.com",
                    "cc": "email2@email.com"
                }
            ]
        }
    }
}
Here, you can see that notifications is under spec and then configurations can be inserted.
They key for the key-value relationship should be the notification type: googlechat, slack, bearychat, email, and pubsub.
Under pipelines there’s always a field when that supports the following values: pipeline.complete, pipeline.failed and pipeline.starting.
Here’s a table with the mapping for the possible values for notifications.
| Type | address field |
|---|---|
| googlechat | Chat Webhook |
| slack | Slack Channel |
| bearychat | Email Address |
| Email Address | |
| pubsub | Publisher Name |
Slack application notifications
If Slack is configured for pipeline.complete or pipeline.failed, a notification gets sent for those channels. Given this configuration:
{
    "application": "testingslack",
    "globals": {
        "save_app_on_update" : true
    },
    "spec": {
        "notifications": {
            "slack": [
                {
                    "when": [ "pipeline.complete" ],
                    "address": "slack-channel-good"
                },
                {
                    "when": [ "pipeline.failed"],
                    "address": "slack-channel-bad"
                },
                {
                    "when": ["pipeline.complete", "pipeline.failed"],
                    "address": "slack-channel-both"
                }
            ]
        }
    }
}
Dinghy sends a notification to channel slack-channel-good and slack-channel-both if a pipeline renders correctly and a notification to slack-channel-bad and slack-channel-both if a pipeline fails to render.
Repository Template processing
Imagine you have a template and a couple of modules and dinghyfiles pointing at them. You modify a module and this module is using Rawdata. At this moment the commited Rawdata is from the template repository, so there can be two possible scenarios:
- The Rawdata from the template repository is taken in order to render all the dependent
dinghyfilesagain. Use therepositoryRawdataProcessing = falseconfig for this behavior. - The Rawdata from the specific
dinghyfilere-rendered is taken to render thedinghyfile. Use therepositoryRawdataProcessing = trueconfig for this behavior.
By default Dinghy uses the Rawdata from the template repository. However, you can enable the second behavior in which the Rawdata from the latest push gets used for that dinghyfile in the specific repository.
apiVersion: spinnaker.armory.io/v1alpha2
kind: SpinnakerService
metadata:
  name: spinnaker
spec:
  spinnakerConfig:
    config:
      armory:
        dinghy:
          repositoryRawdataProcessing: true
          ... # Rest of config omitted for brevity
Then, update the SpinnakerService with your updated manifest:
kubectl -n spinnaker apply -f spinnakerservice.yml
Repository Template processing example
Given the following scenario:
dinghyfile in armory/my-repository:
  {
    "application": "processtemplate",
    "pipelines": [
      {
        "application": "processtemplate",
        "name": "my-pipeline-name",
        "stages": [
          {
            "name": "{{ .RawData.repository.full_name }}",
            "type": "wait",
            "waitTime": 10
          },
          {{ module "stage.minimal.wait.module" }}
        ]
      }
    ]
}
stage.minimal.wait.module in armory/template-repo:
{
  "name": "{{ var "waitname" ?: "Wait module" }}",
  "waitTime":  "{{ var "waitTime" ?: 10 }}",
  "type": "wait"
}
When you make a commit to change stage.minimal.wait.module in armory/template-repo, all the dependent pipelines get rendered again (in this case the dinghyfile from armory/my-repository). For that the string {{ .RawData.repository.full_name }} will be:
- With
repositoryRawdataProcessing=falsethe result isarmory/template-repo - With
repositoryRawdataProcessing=truethe result isarmory/my-repository
Feedback
Was this page helpful?
Thank you for letting us know!
Sorry to hear that. Please tell us how we can improve.
Last modified October 17, 2023: (aa87b671)